This tutorial will show you how to easily use UbikLoadPack VideoStreaming Plugin with Docker in few steps.
You just have to run some scripts and edit some files. Note that linux is required.
All source code shown in this blog is available from this github repository.
Finally, as the main executable uses Docker Compose, it needs to be installed. The main executable begins a distributed test :
- the workers starts the JMeter servers by executing
jmeterwith option--server - the controller specifies the remote hosts with
-R ${REMOTE_WORKERS_TRIGGERED}
More information about Apache JMeter Distributed Testing.
This tutorial shows an example with containers on the same network. But if you want to use UbikLoadPack VideoStreaming Plugin with Docker on different machines a solution would be to run compose on a swarm cluster. In short :
- run your Docker Engine in swarm mode
- create registry and push image to distribute it to different nodes
- deploy to the swarm using docker-compose.yml
More information about Deploy a stack to a swarm, about Networking in Compose.
To use UbikLoadPack VideoStreaming Plugin with Docker you can follow those steps :
Pre-requisite : Install Docker Compose
Docker Compose is used by the main executable docker/run-jmeter-in-docker.sh. Therefore you have to install it if it is not already present.
You can check if it is already installed by executing

If it is not the case, you can install it by following the instructions given by Docker documentation : Install Docker Compose
Configuration
First step : Automatically generate folders
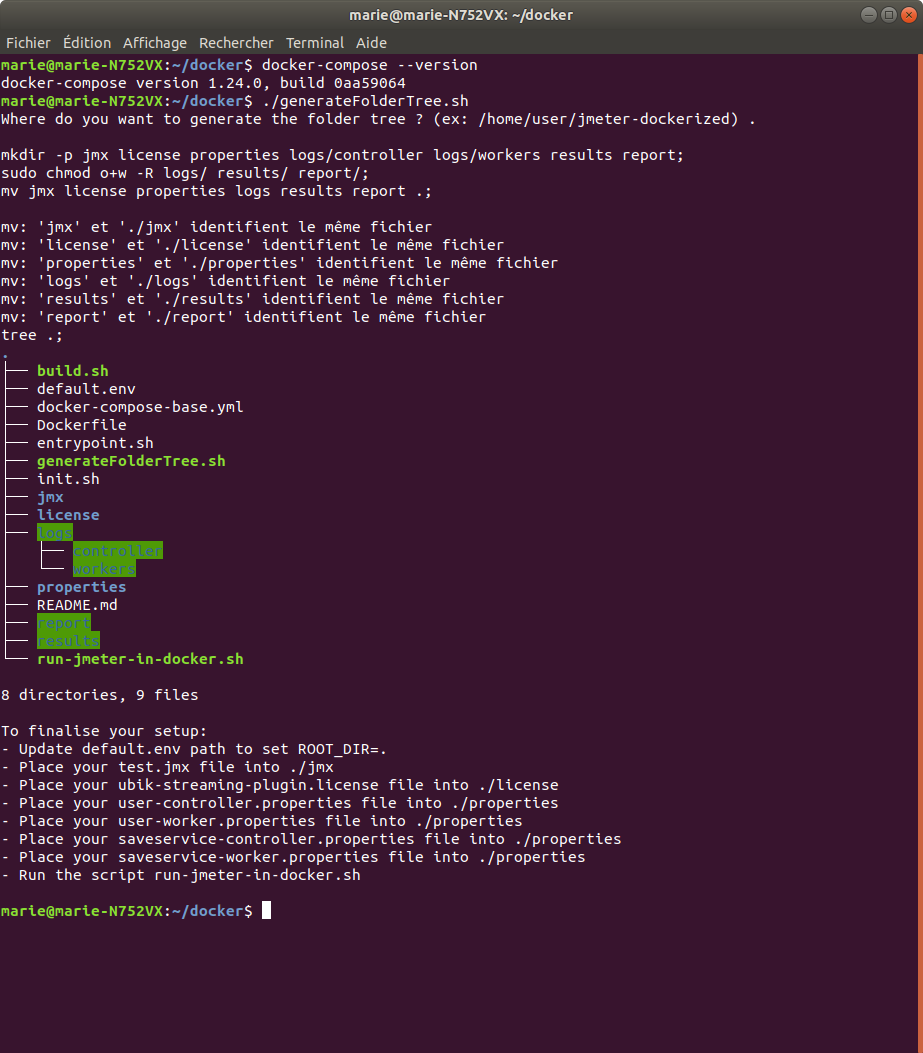
First, you have to run docker/generateFolderTree.sh to generate automatically the needed folders with right permissions. The script is going to ask you Where do you want to generate the folder tree ? (ex: /home/user/jmeter-dockerized)

Next, you just have to input the path to the folder where you want to generate those folders and press ENTER key.

Then, the script creates this folder for you if it does not already exist.
Next, it creates the folders needed for the execution of main executable docker/run-jmeter-in-docker.sh.
Those folders are :
jmxlicensepropertieslogs/controllerlogs/workersresultsreport
docker/run-jmeter-in-docker.sh will need logs, results and report to write some files. So the script gives permission to write those folders and their content for users not in your group.
Finally, it lists the content of the directory you chose at the beginning.
And it gives you last configuration instructions.
For the second step, you just have to follow those instructions : edit and move some files. Then you will be able to use UbikLoadPack VideoStreaming Plugin with Docker by executing the last script.
Second and last step
Secondly, to finish the configuration, you have to :
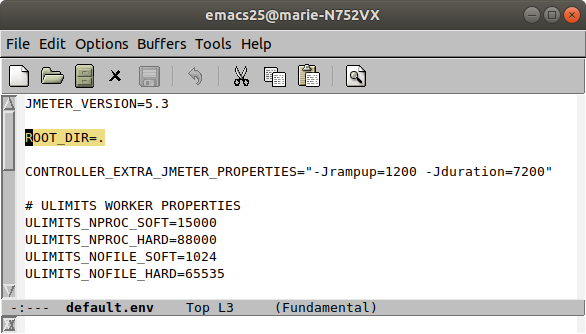
Update default.env path to set ROOT_DIR=the folder you chose during generateFolderTree.sh
Optionally, you can set JVM_ARGS_CONTROLLER and JVM_ARGS_WORKER. Controller will execute set JVM_ARGS=${JVM_ARGS_CONTROLLER} and worker set JVM_ARGS=${JVM_ARGS_WORKER} before running jmeter.
Choose the test plan you want to execute and place it in jmx folder.
You have to name this file test.jmx.
Place your UbikLoadPack VideoStreaming Plugin license in license folder and name it ubik-streaming-plugin.license

Copy twice your user.properties file and name those copies:
user-controller.propertiesfor controller propertiesuser-worker.propertiesfor worker properties
Place them in properties folder.
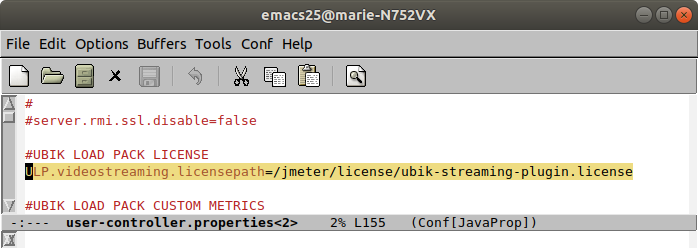
In both files, property ULP.videostreaming.licensepath must have the following value /jmeter/license/ubik-streaming-plugin.license.


Same thing for saveservice.properties file, copy it and and name those copies:
saveservice-controller.propertiessaveservice-worker.properties.
Place them in properties folder.

Workers will run jmeter with properties user-worker.properties and saveservice-worker.properties.
Respectively, controller uses user-controller.properties and saveservice-controller.properties.
To clarify, you should have following directories contents :

Run UbikLoadPack VideoStreaming Plugin with Docker
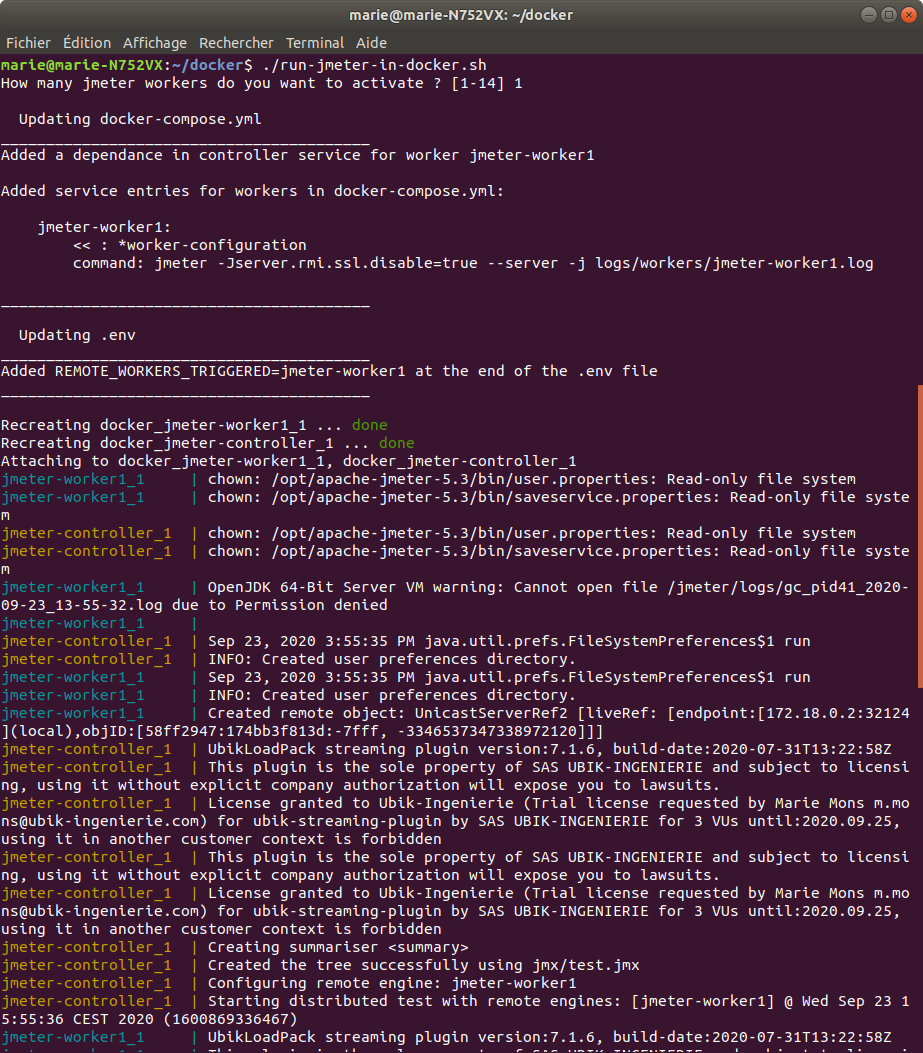
Now you finished the configuration, you can run the main executable docker/run-jmeter-in-docker.sh.

First, the script asks you How many jmeter workers do you want to activate ? [1-14]. By default the maximum number of workers is 14. If you want to change this value you can execute export MAX_WORKER_NB=value to give a value of your choice before executing this script.
Just input a number between 1 and 14, or the value you choose, included and press ENTER key.

Second, for each worker the script creates a dependance of controller for this worker. And also creates the command this worker will execute. Then it adds property REMOTE_WORKERS_TRIGGERED with value jmeter-worker1, ... to jmeter-workern, with n the number of jmeter workers.
Finally, it executes docker-compose up which runs the jmeter controller.
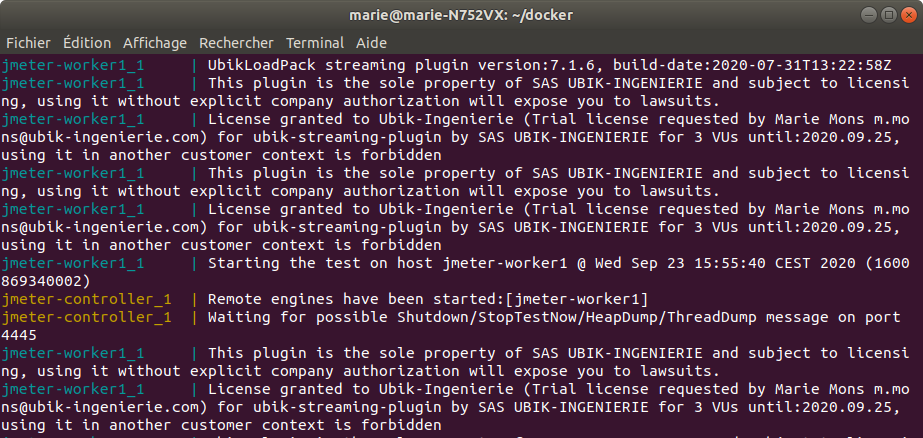
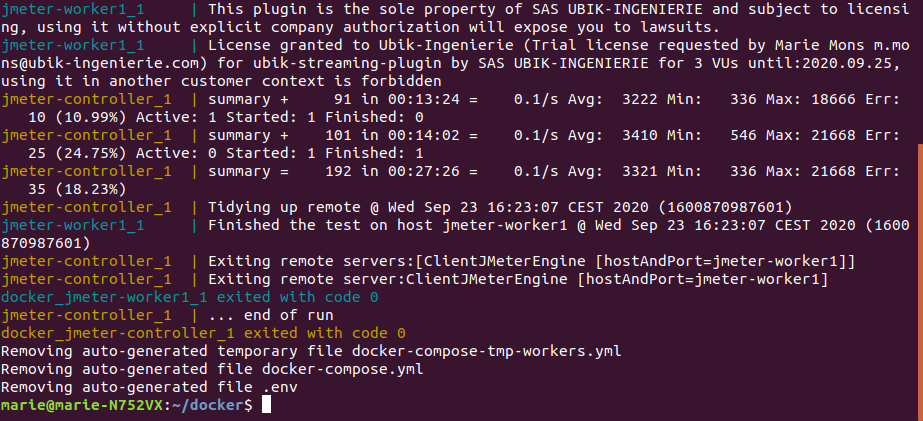
When the run finishes, you can open docker/report/index.html to view your Apache JMeter Dashboard with graphs and statistics.
About UbikLoadPack:
- Ubik Load Pack is used by Big players in the Video streaming field
- We provide professional services for Load Testing
- Learn more about our streaming plugin
- Get a Free trial
Other links:
- Video Streaming Top 5 metrics to analyze your User’s Experience
- Load testing MPEG-DASH Video Streaming with Apache JMeter and UbikLoadPack
- Video Streaming: CMAF and Low-Latency
L’article Using UbikLoadPack VideoStreaming Plugin with Docker est apparu en premier sur Ubik Ingénierie.