Quantcast
Channel: JMETER – Ubik Ingénierie

Running a Video Streaming Performance Test with OctoPerf and UbikLoadPack

$
0
0

Running a Video Streaming Performance Test with OctoPerf and UbikLoadPack

In this blog, we will see how to run a Video Streaming Performance Test on a server delivering one of the following formats:

  • Apple HLS
  • Mpeg-Dash
  • Microsoft Smooth (HSS)
  • Adobe HDS

We’ll use the following tools:

Pre-requisites

To run what is described below:

  • Install Java 11 or Java 17
  • Install Apache JMeter
  • Request a trial version of UbikLoadPack Video Streaming Plugin, you’ll receive a mail with an attached trial license and a link to download the bundle
  • Get an OctoPerf account

The JMeter test plan

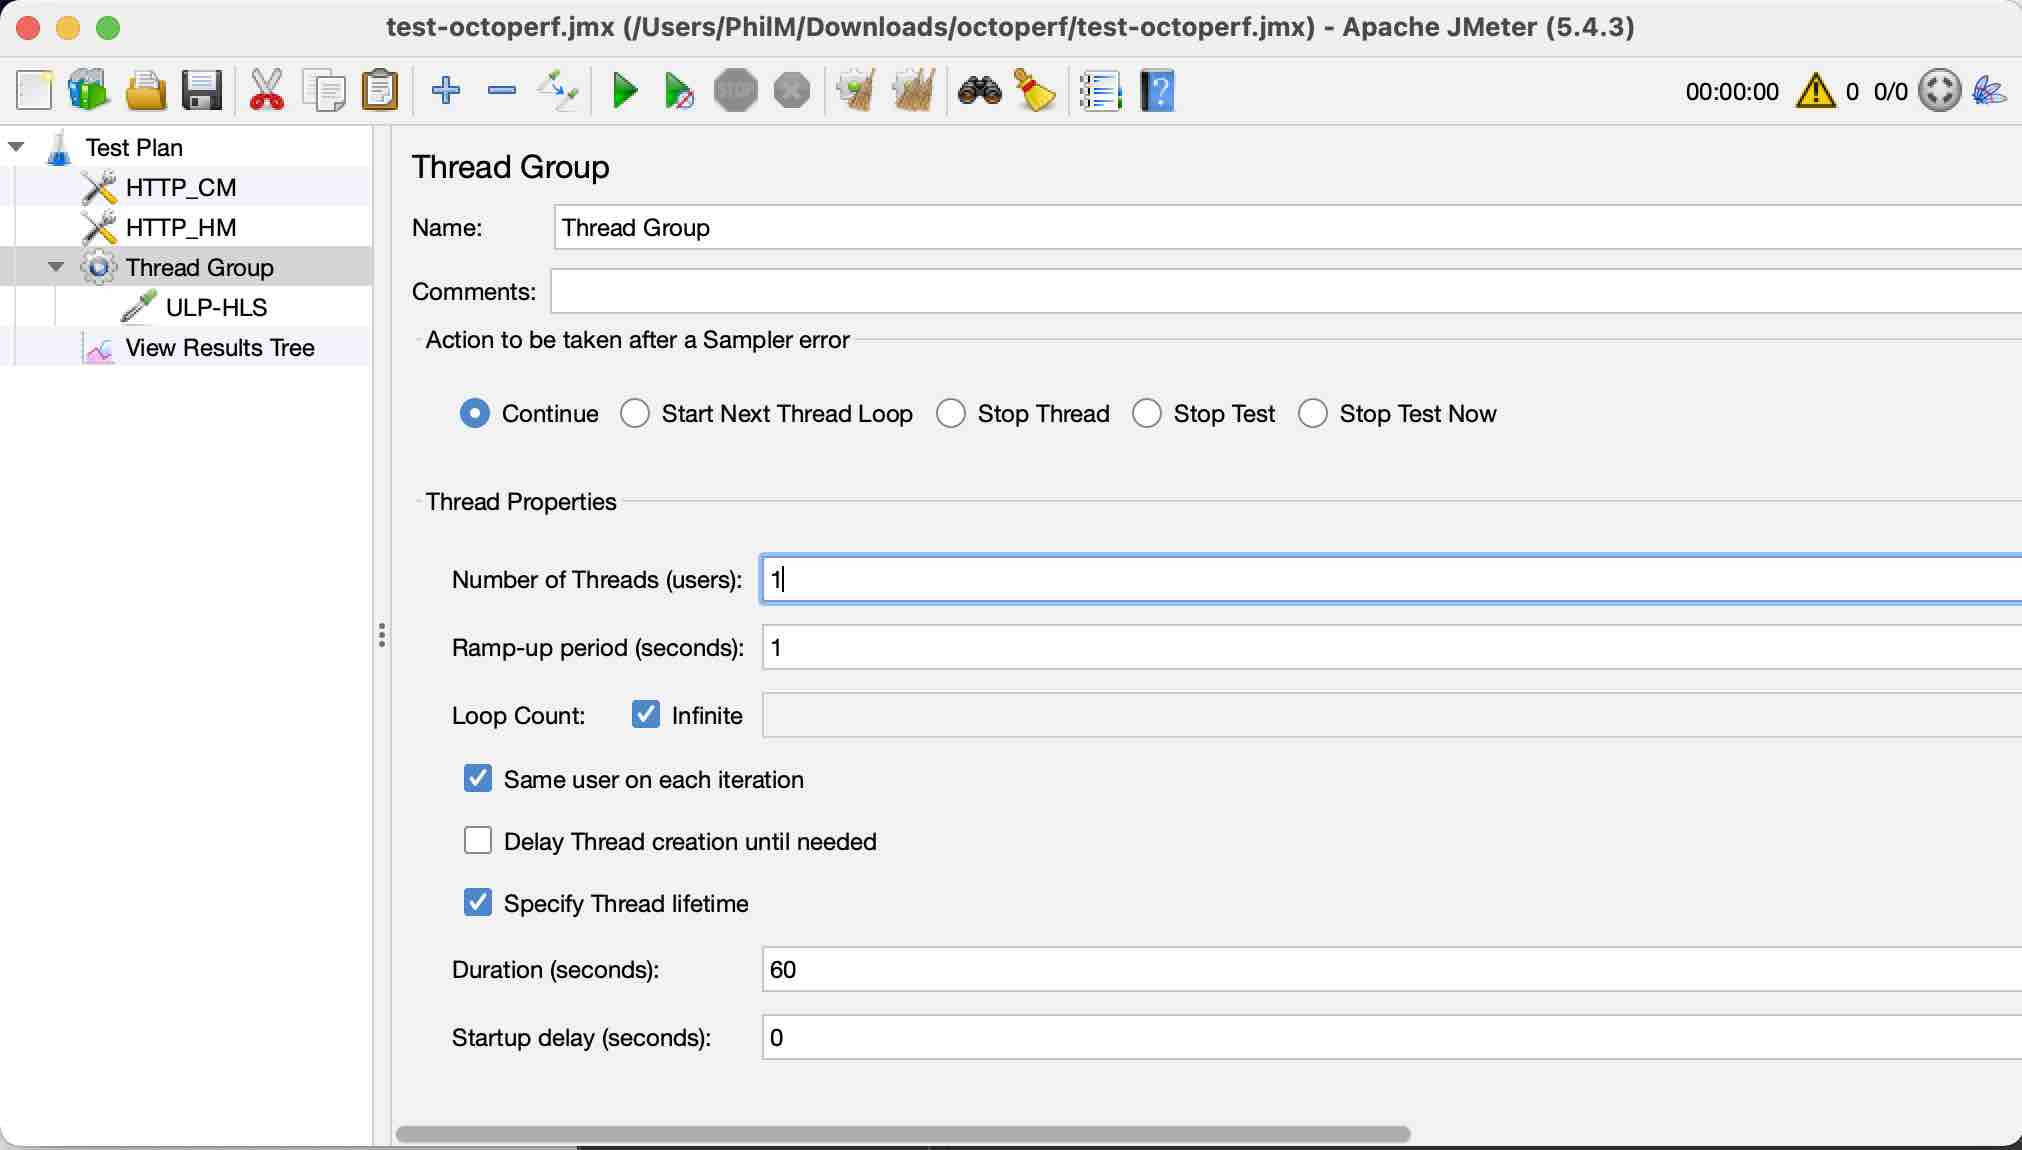
We’ll use a very simple test plan :

Note that we don’t configure anything in Thread Group regarding Users Arrival and schedule as it will be done on OctoPerf
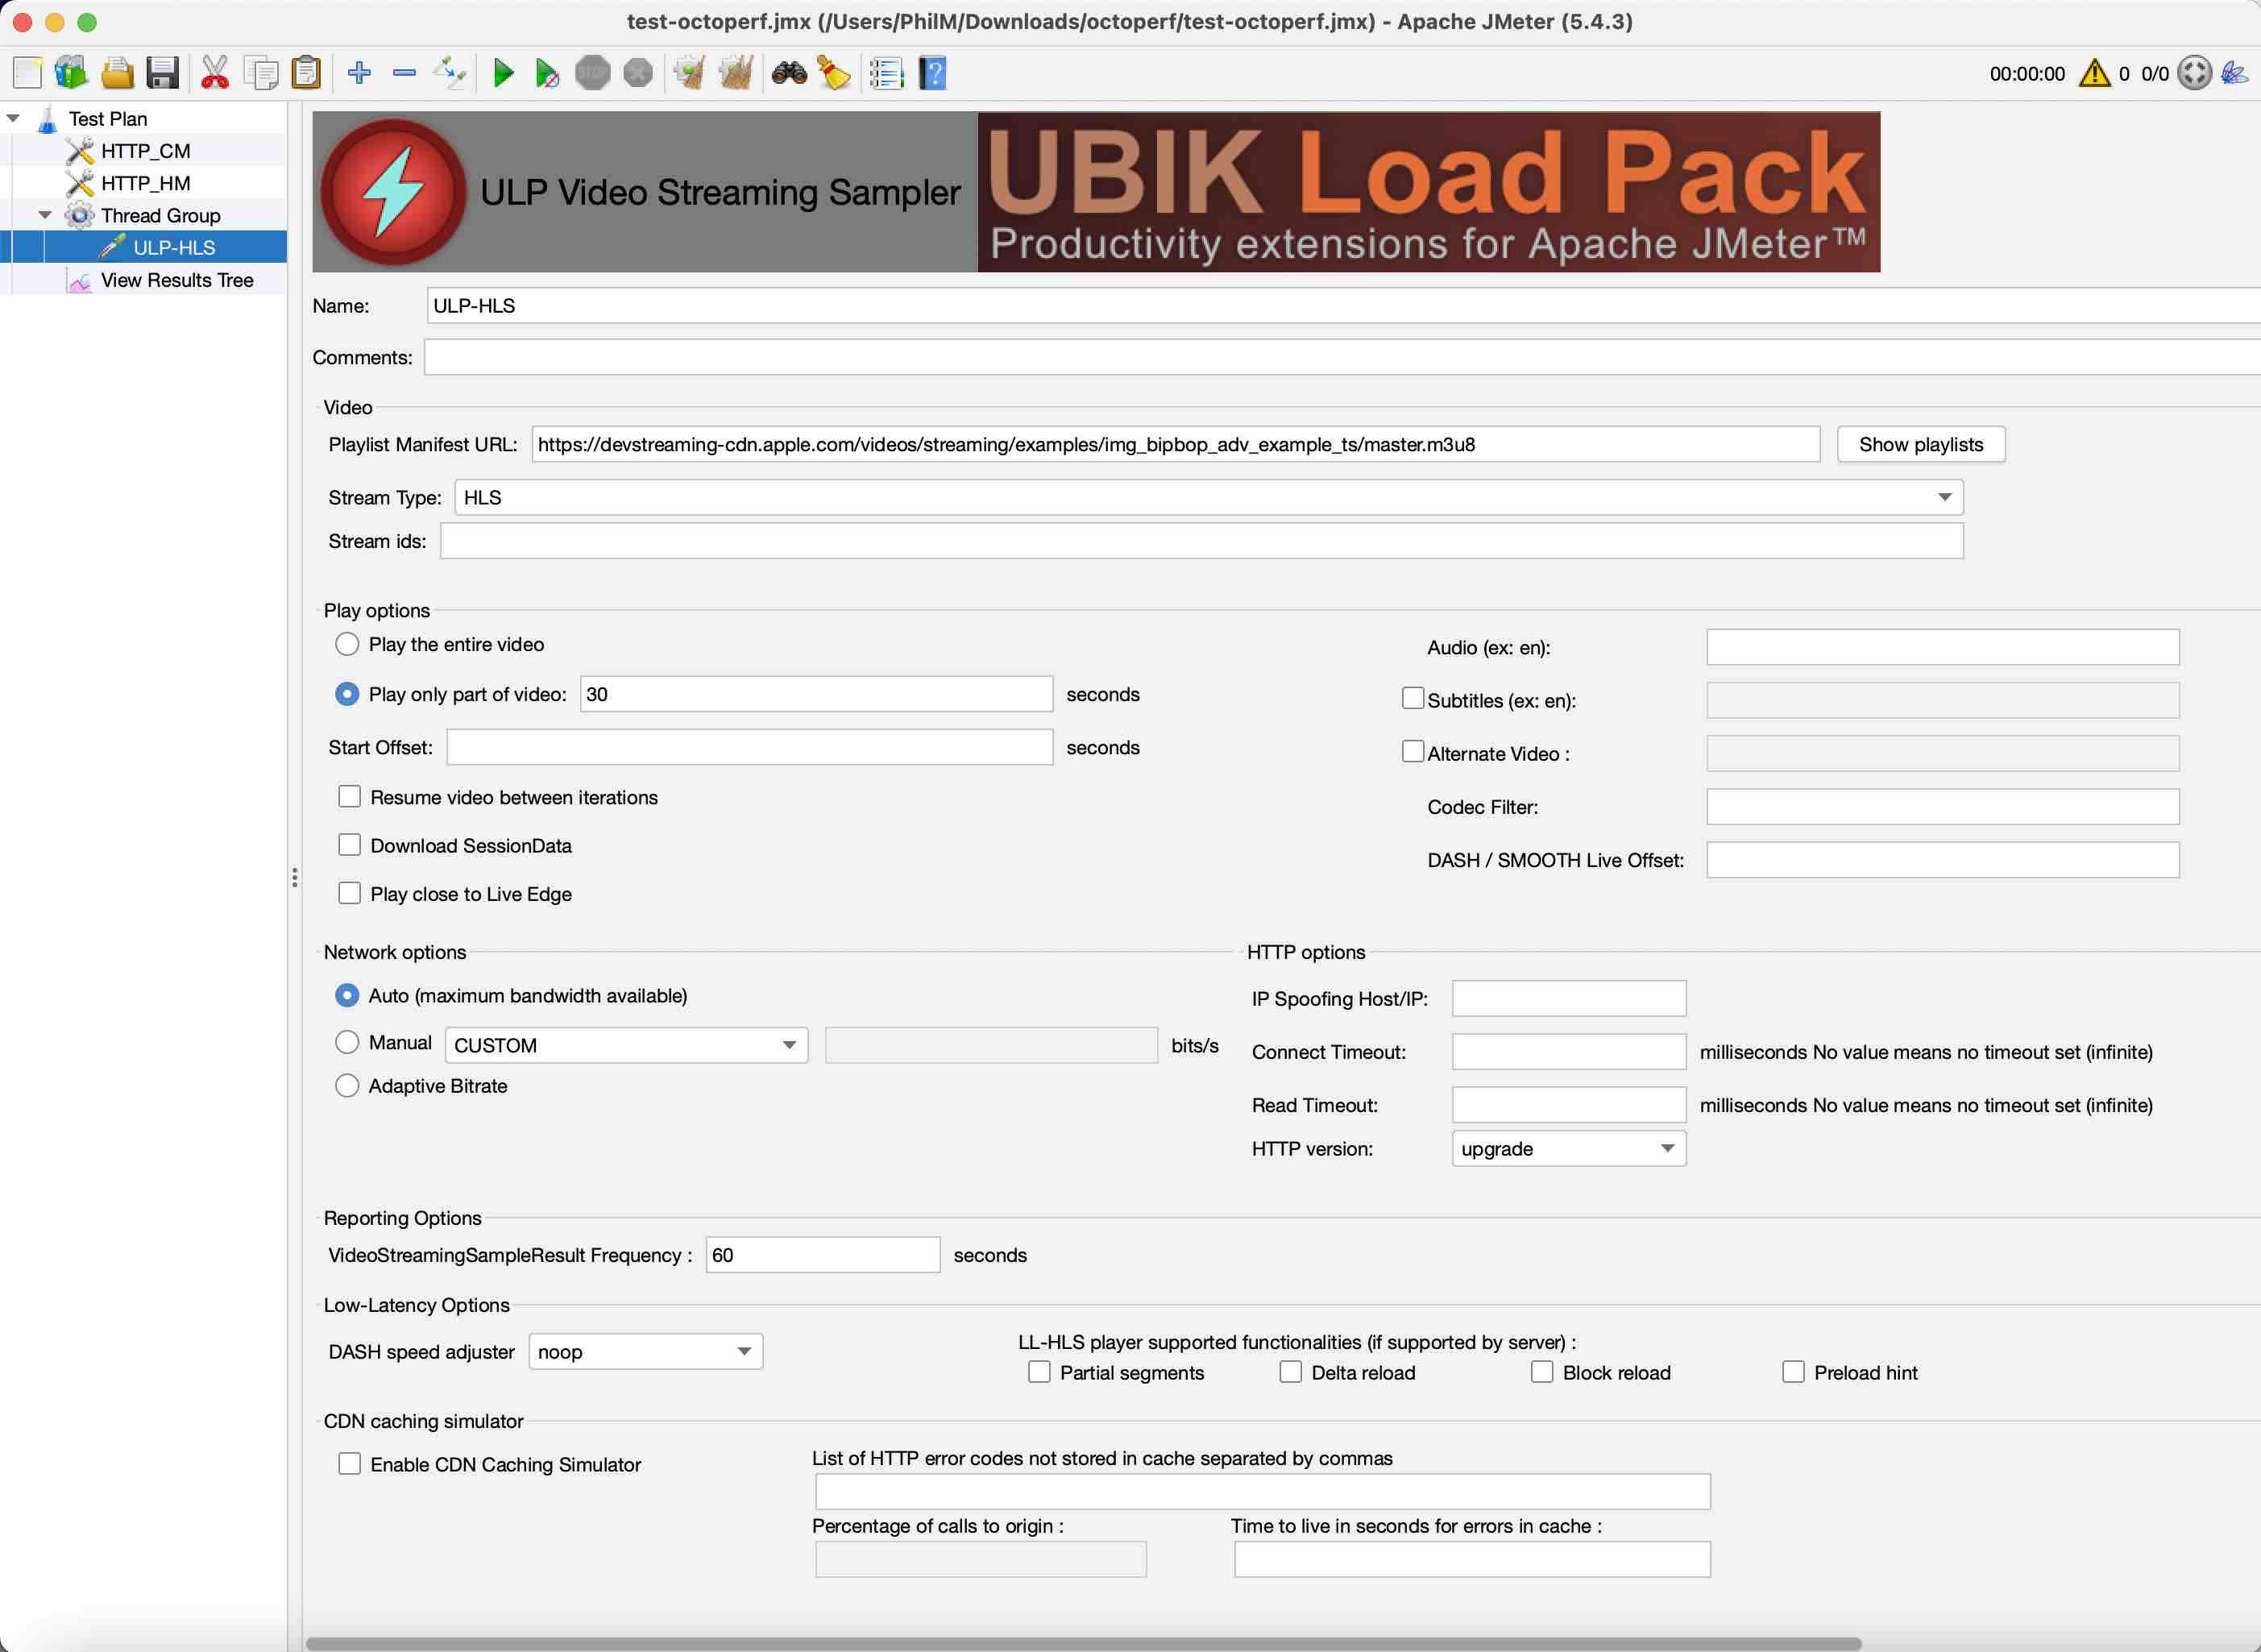
In UbikLoadPack streaming sampler we just set :

  • Playlist URL to the HLS manifest URL , we will use https://devstreaming-cdn.apple.com/videos/streaming/examples/img_bipbop_adv_example_ts/master.m3u8
  • Play only part of video is set to 30 seconds
Creation Steps on OctoPerf

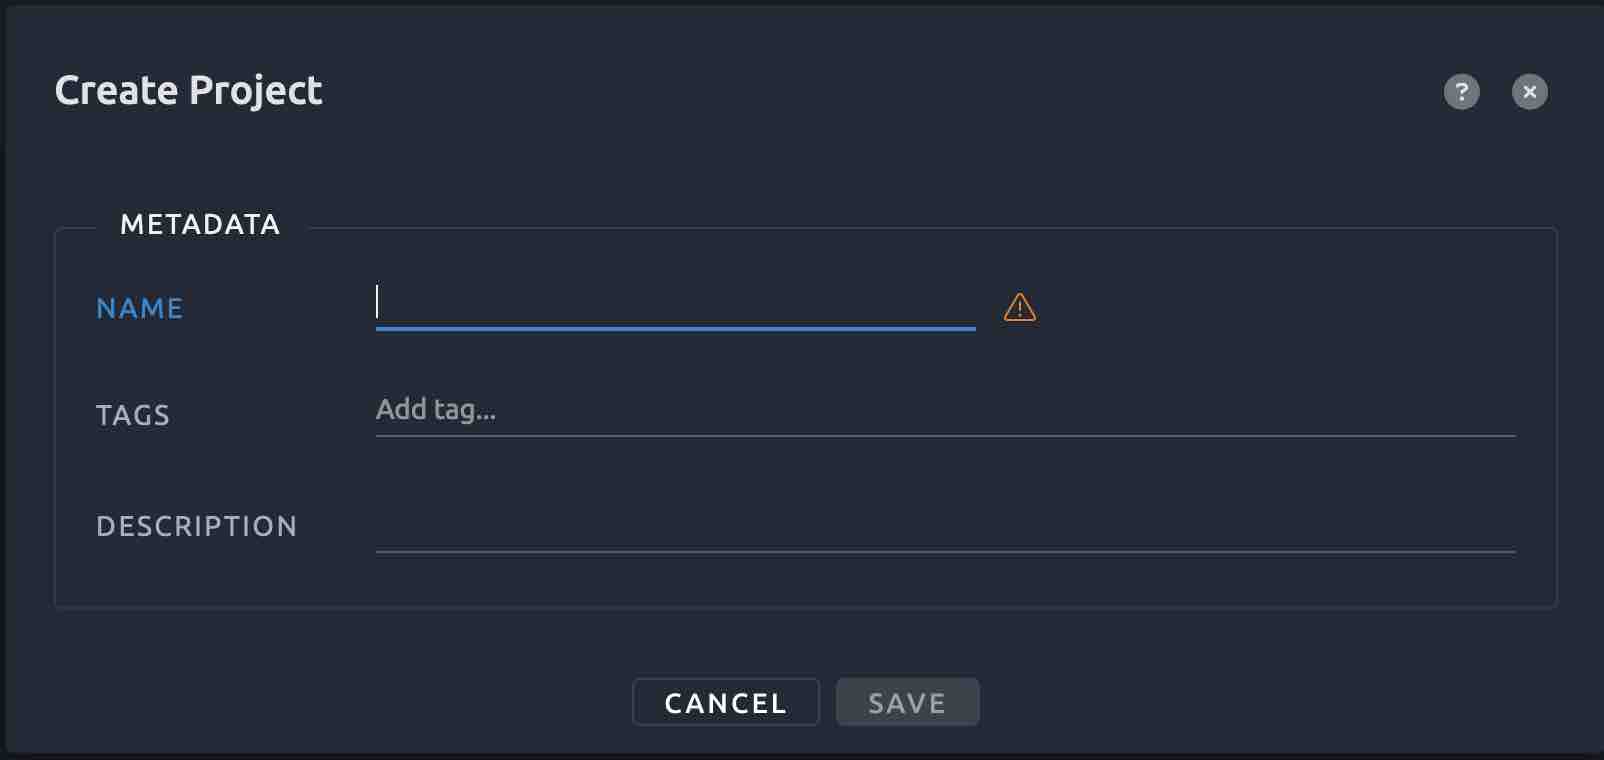
Login to OctoPerf and click on Create Project:
Select JMeter Project:
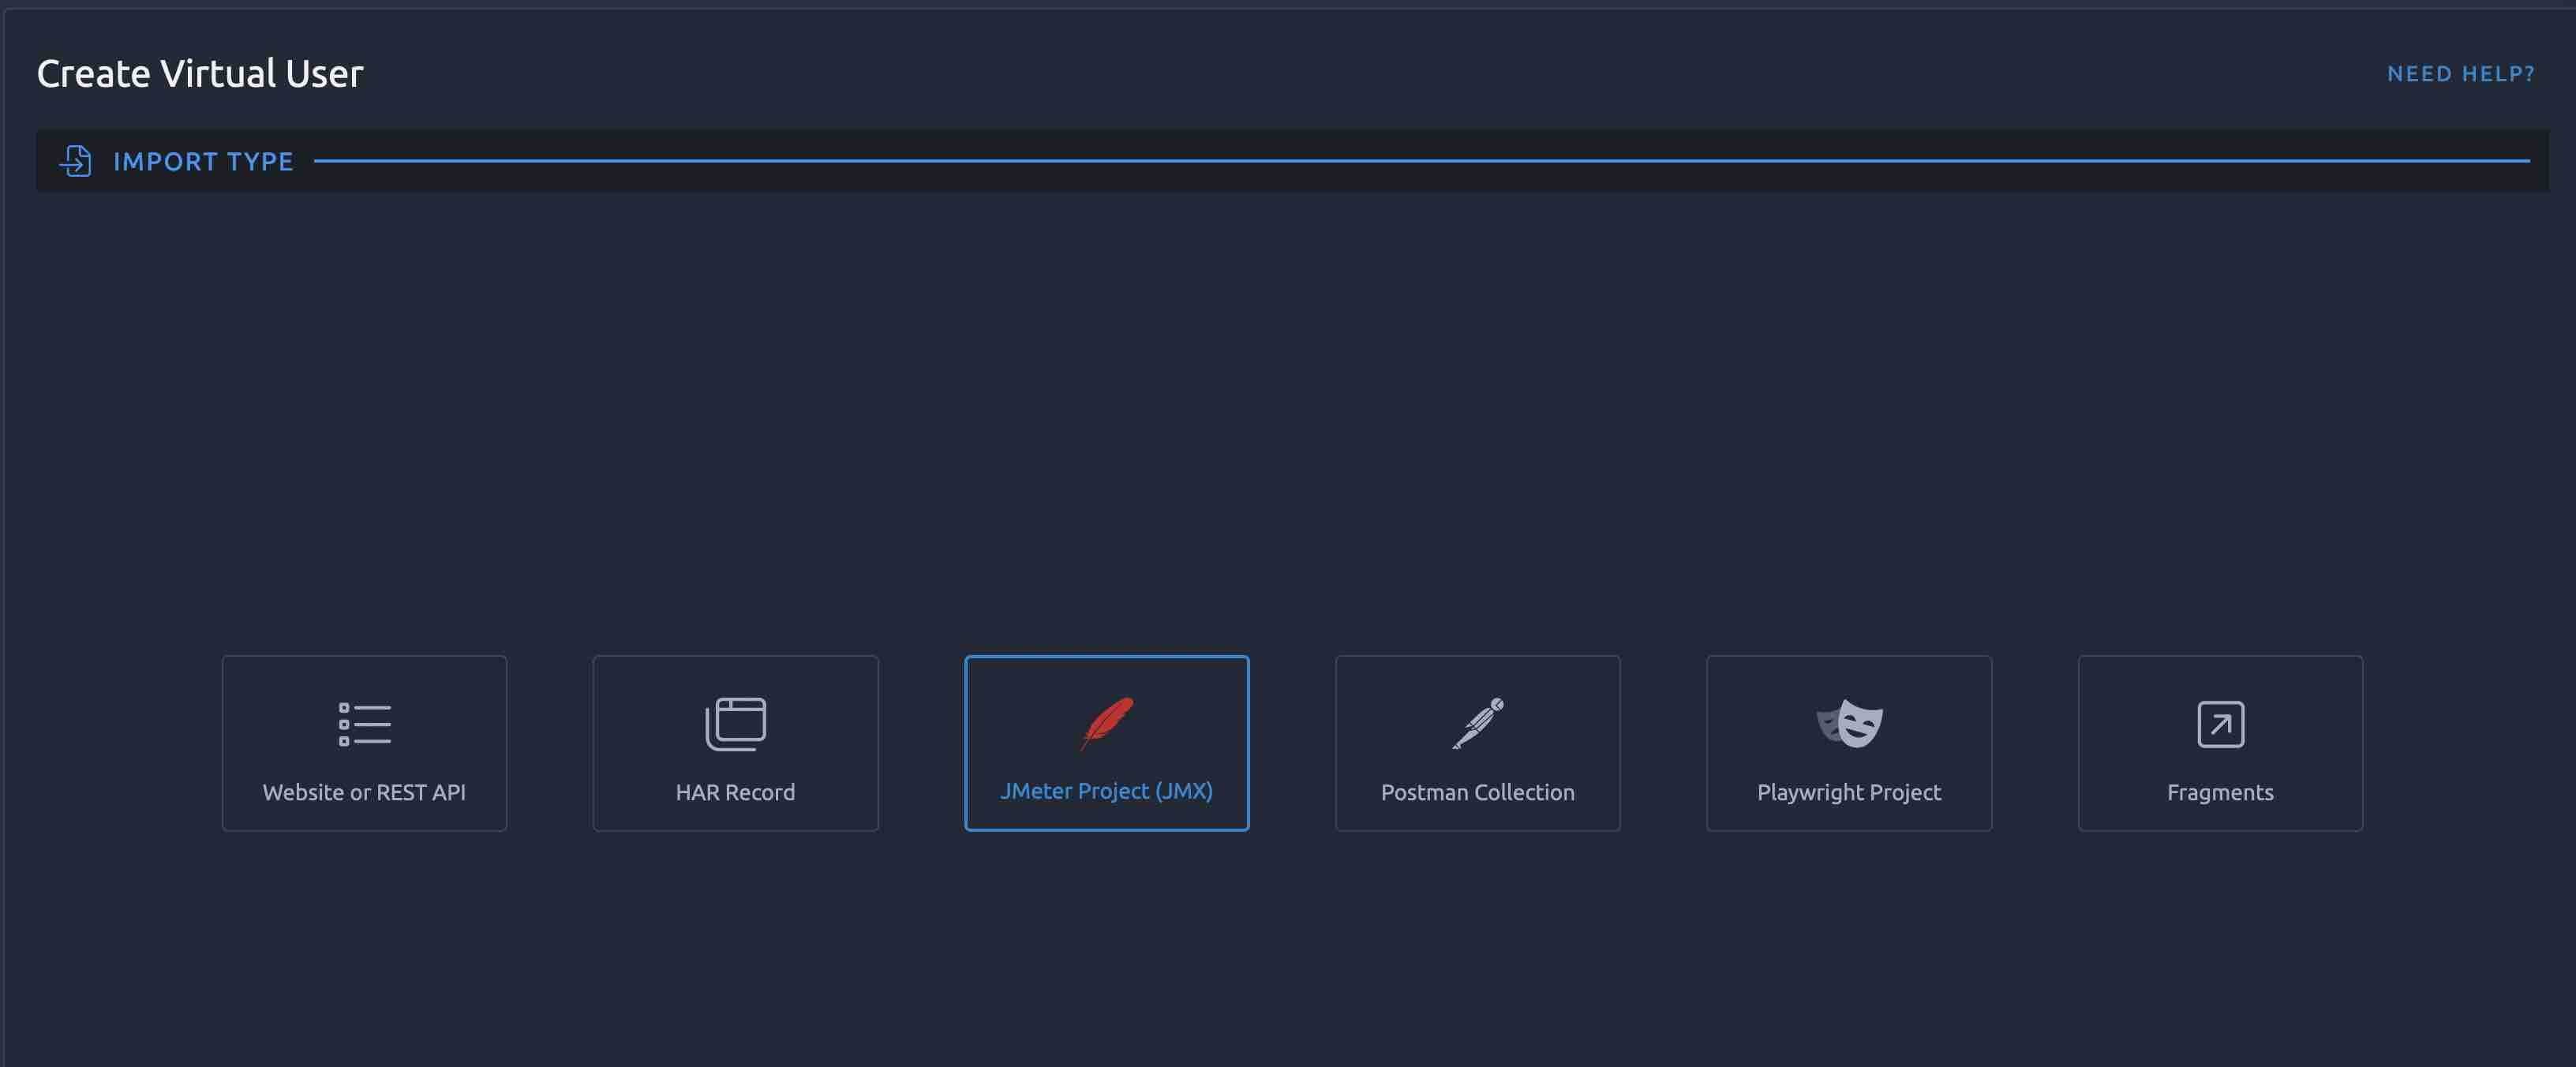
You’ll see this screen:
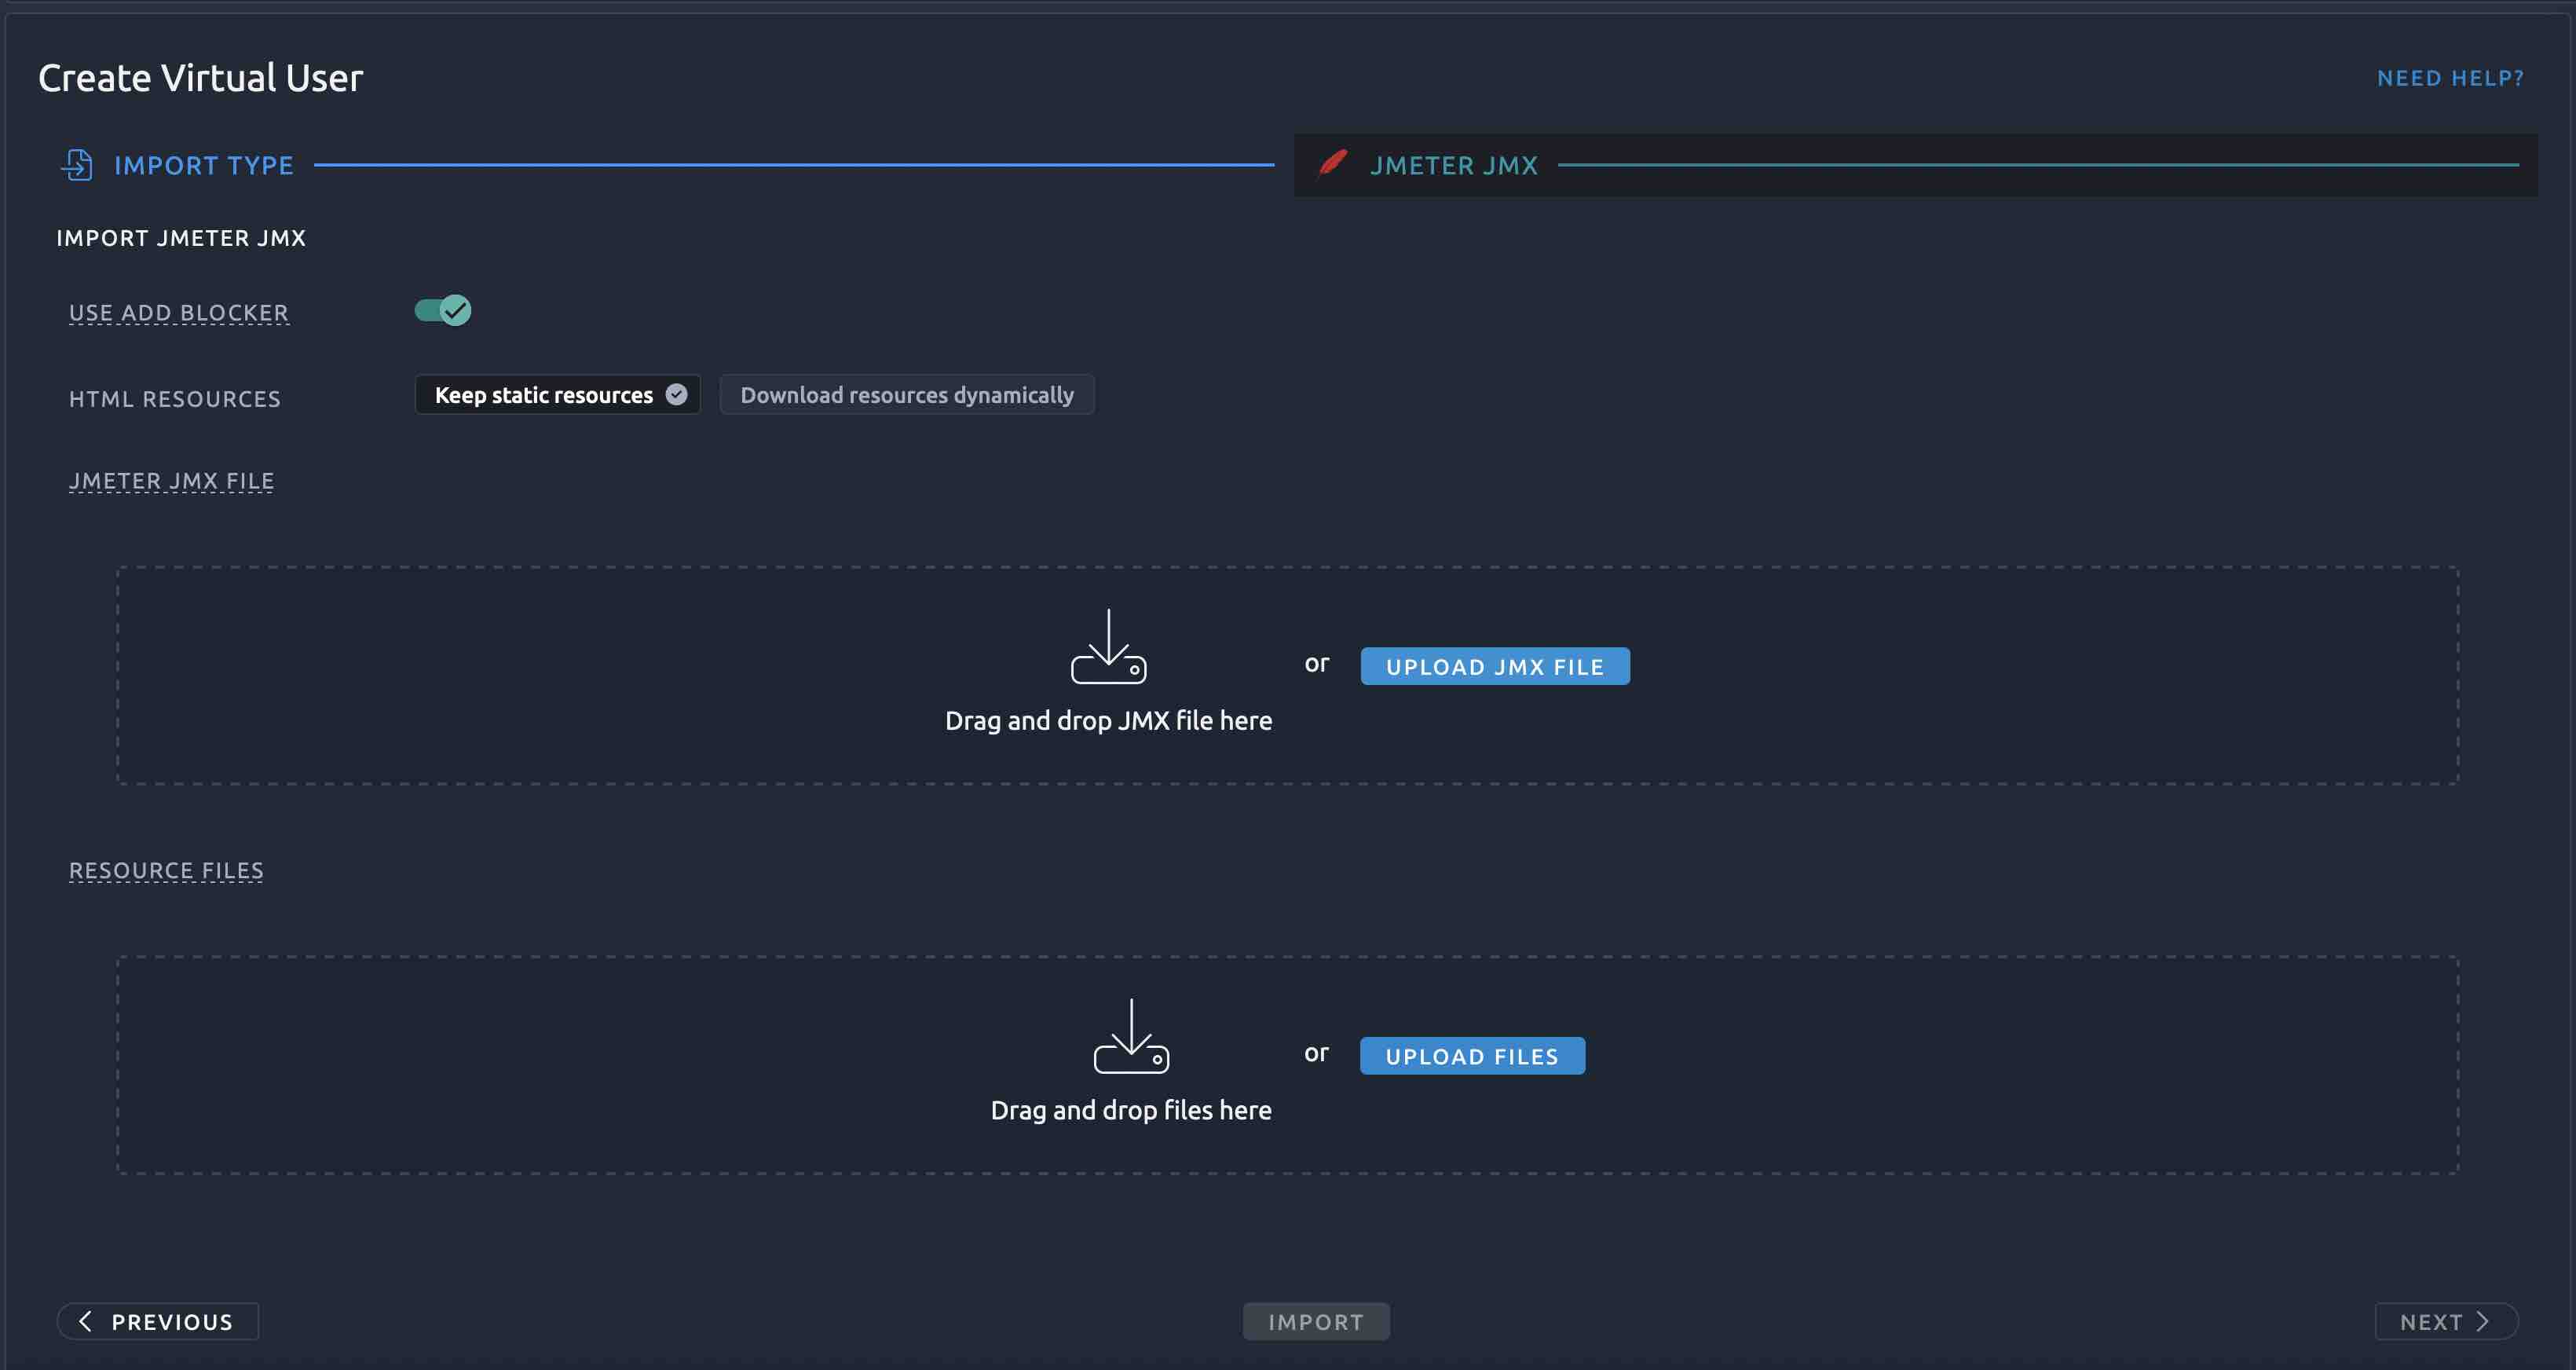
  1. Upload your JMeter JMX file in JMETER JMX FILE section
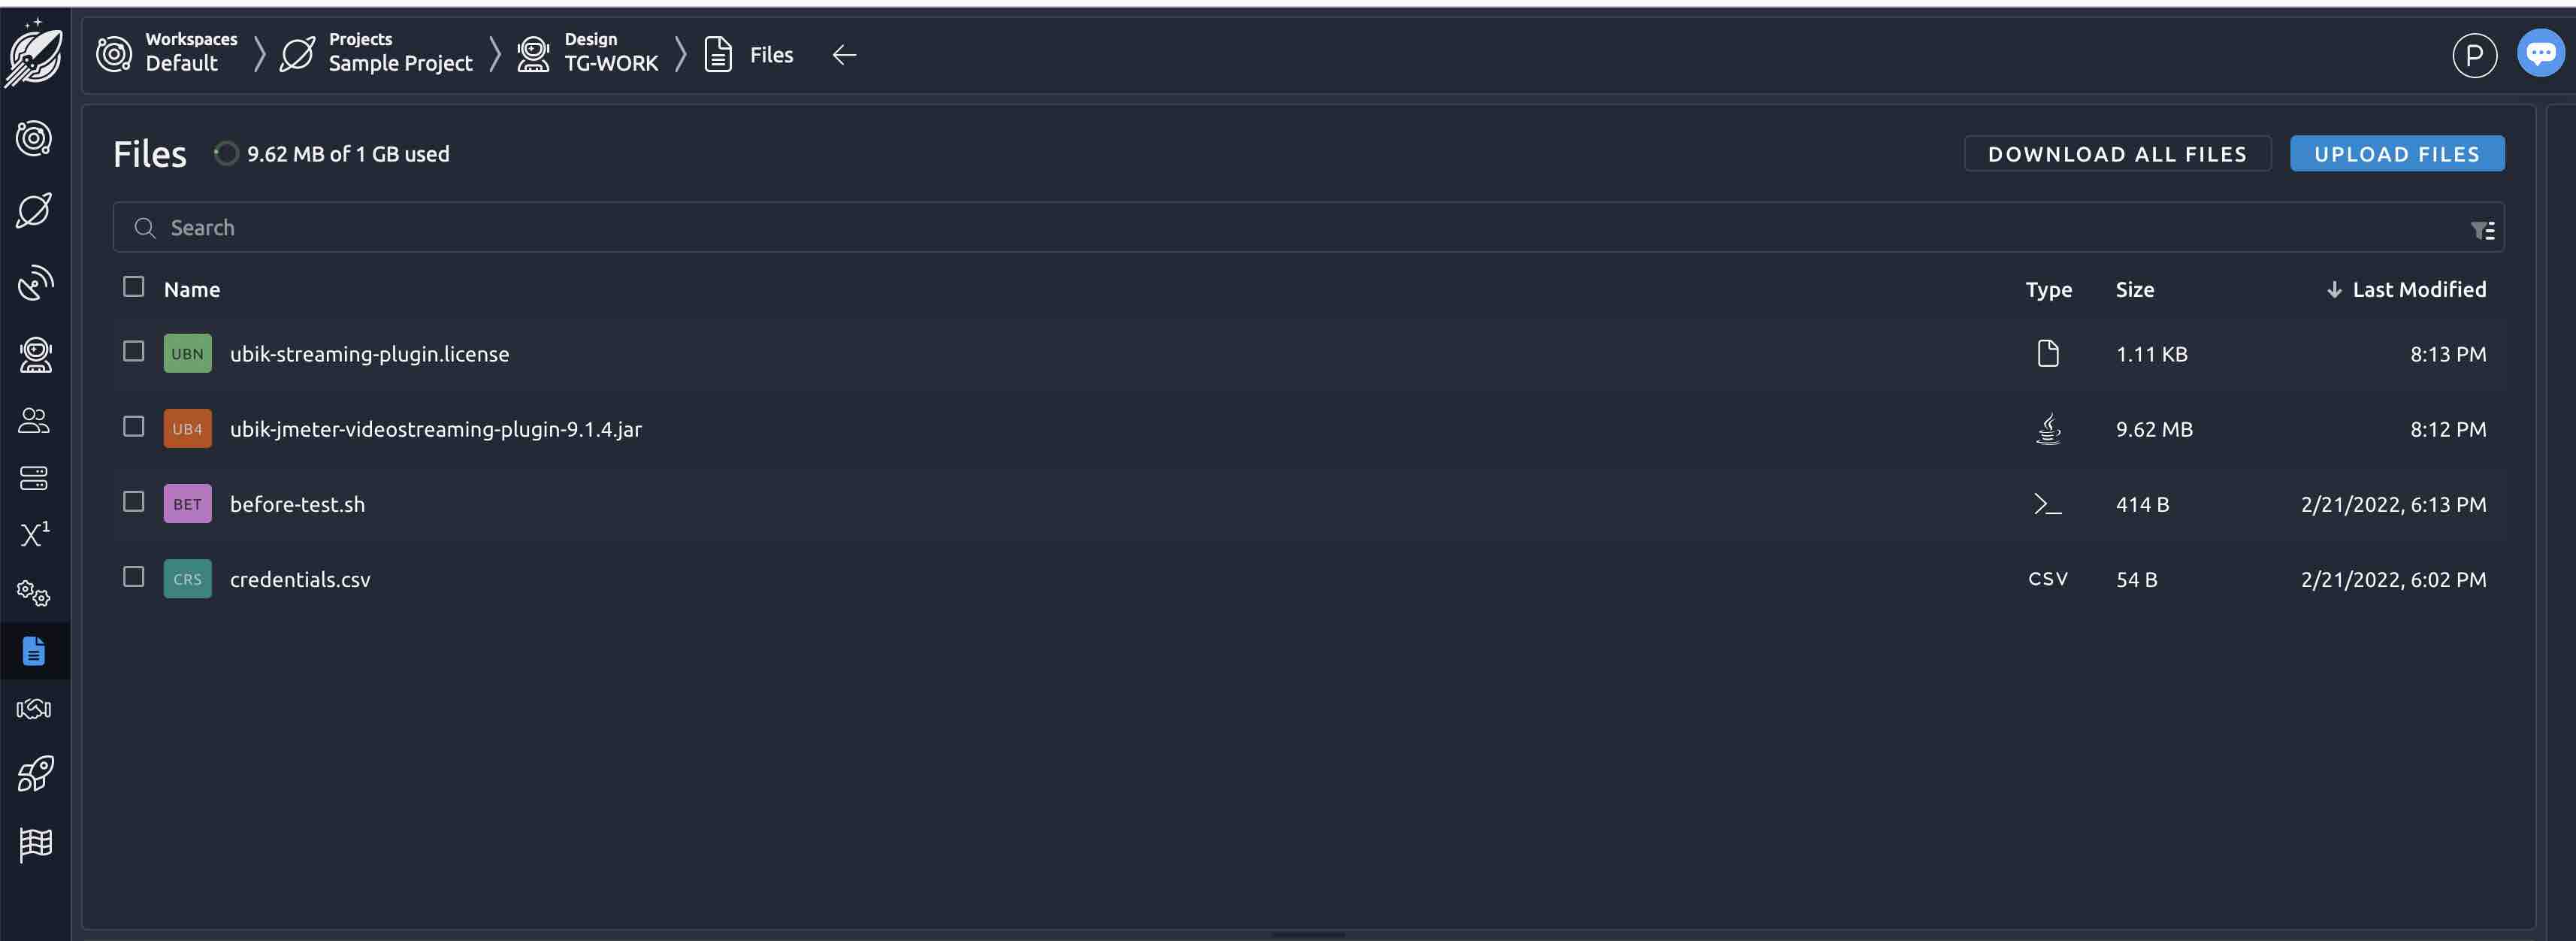
  2. Then upload the following resource files in RESOURCE FILES section:
  • ubik-streaming-plugin.license (attached to the trial mail you receive from UbikLoadPack on trial request)
  • the plugin jar file located in the lib/ext folder in the bundle link you receive in the trial mail or downloadable from here
  • before-test.sh (see below for its content and explanation)
  • any CSV file required by your test and configured through CSV DataSet (we don’t have one in the test, but just to show it, we have uploaded one called credentials.csv)

You end up with this:
Contents of before-test.sh :

before-test.sh is a specific shell file that is executed by OctoPerf before the test runs as described here. It is by convention, you need to keep this name.

The content of our file is:

#!/usr/bin/env bash
export JVM_ARGS="${JVM_ARGS} -Djava.net.preferIPv4Stack=true -XX:MaxGCPauseMillis=20 -Xss256k -Dsun.net.inetaddr.ttl=5 -Dsun.net.inetaddr.negative.ttl=0"

USER_PROPS=${JMETER_HOME}/bin/user.properties
echo "ULP.videostreaming.licensepath=resources/ubik-streaming-plugin.license"  >> ${USER_PROPS}
echo "httpclient4.retrycount=0"  >> ${USER_PROPS}
cat ${USER_PROPS}

Explanation of before-test.sh

1) The first line sets some JAVA VIRTUAL MACHINE properties:

  • java.net.preferIPv4Stack=true tell the JVM to use IPv4 to connect to hosts (this can be removed if you don’t need it)
  • -Dsun.net.inetaddr.ttl=5 -Dsun.net.inetaddr.negative.ttl=0 : is useful to avoid DNS issues on injector
  • -XX:MaxGCPauseMillis=20 -Xss256k : Are memory tunings that can be adjusted as per your need

2) The second and third lines are the most important one for the Plugin, they set up the license path which is mandatory for the plugin to work through property ULP.videostreaming.licensepath

3) The last 2 lines show you how to adjust and add other JMeter properties, in this case httpclient4.retrycount

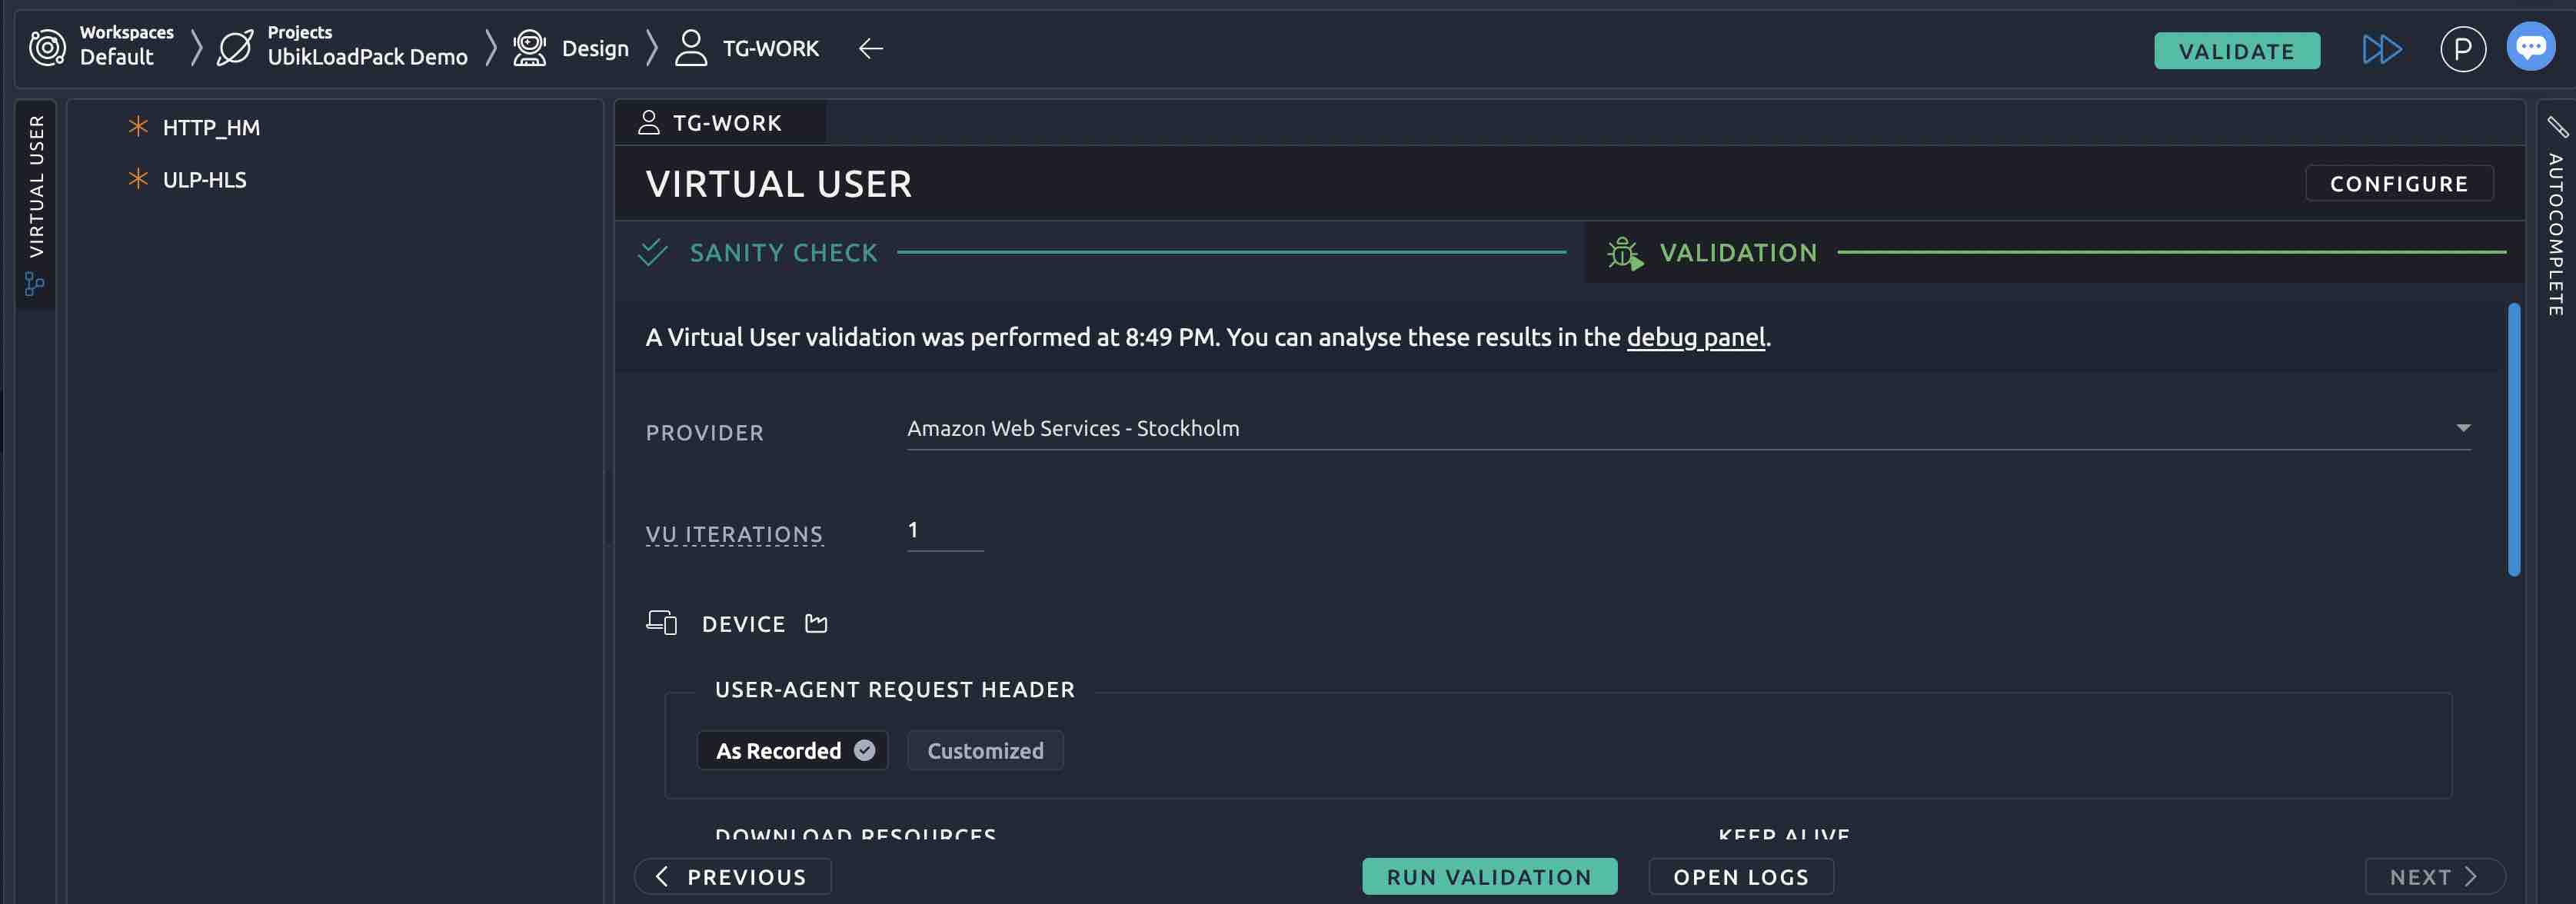
Then click on Validate:

OctoPerf allows you to validate that your configuration is ok by using Validate button
Define the load profile

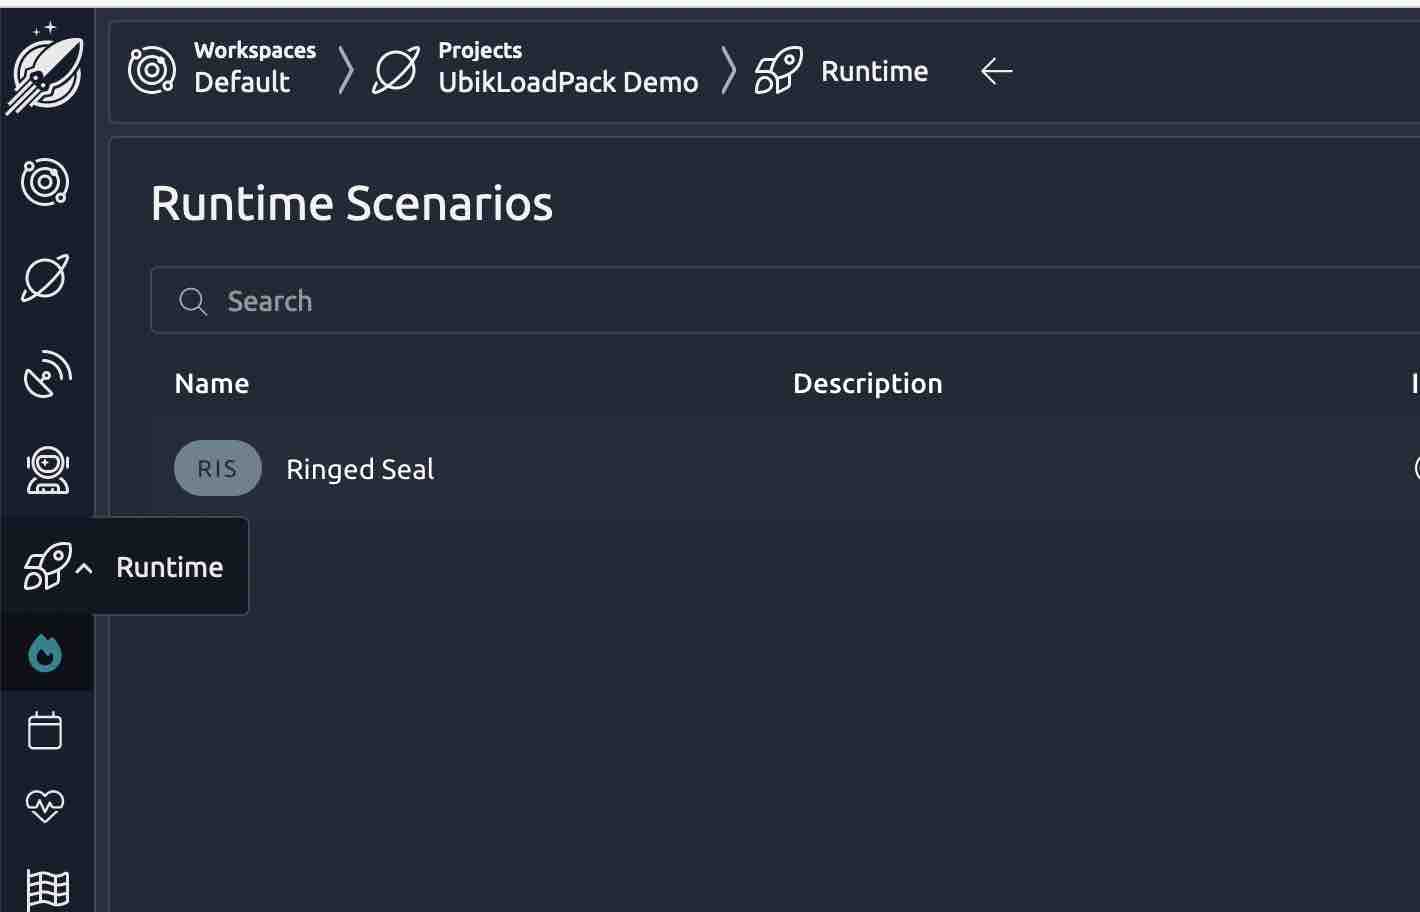
The next step is to define your Load Profile, click on Scenarios inside Runtime:
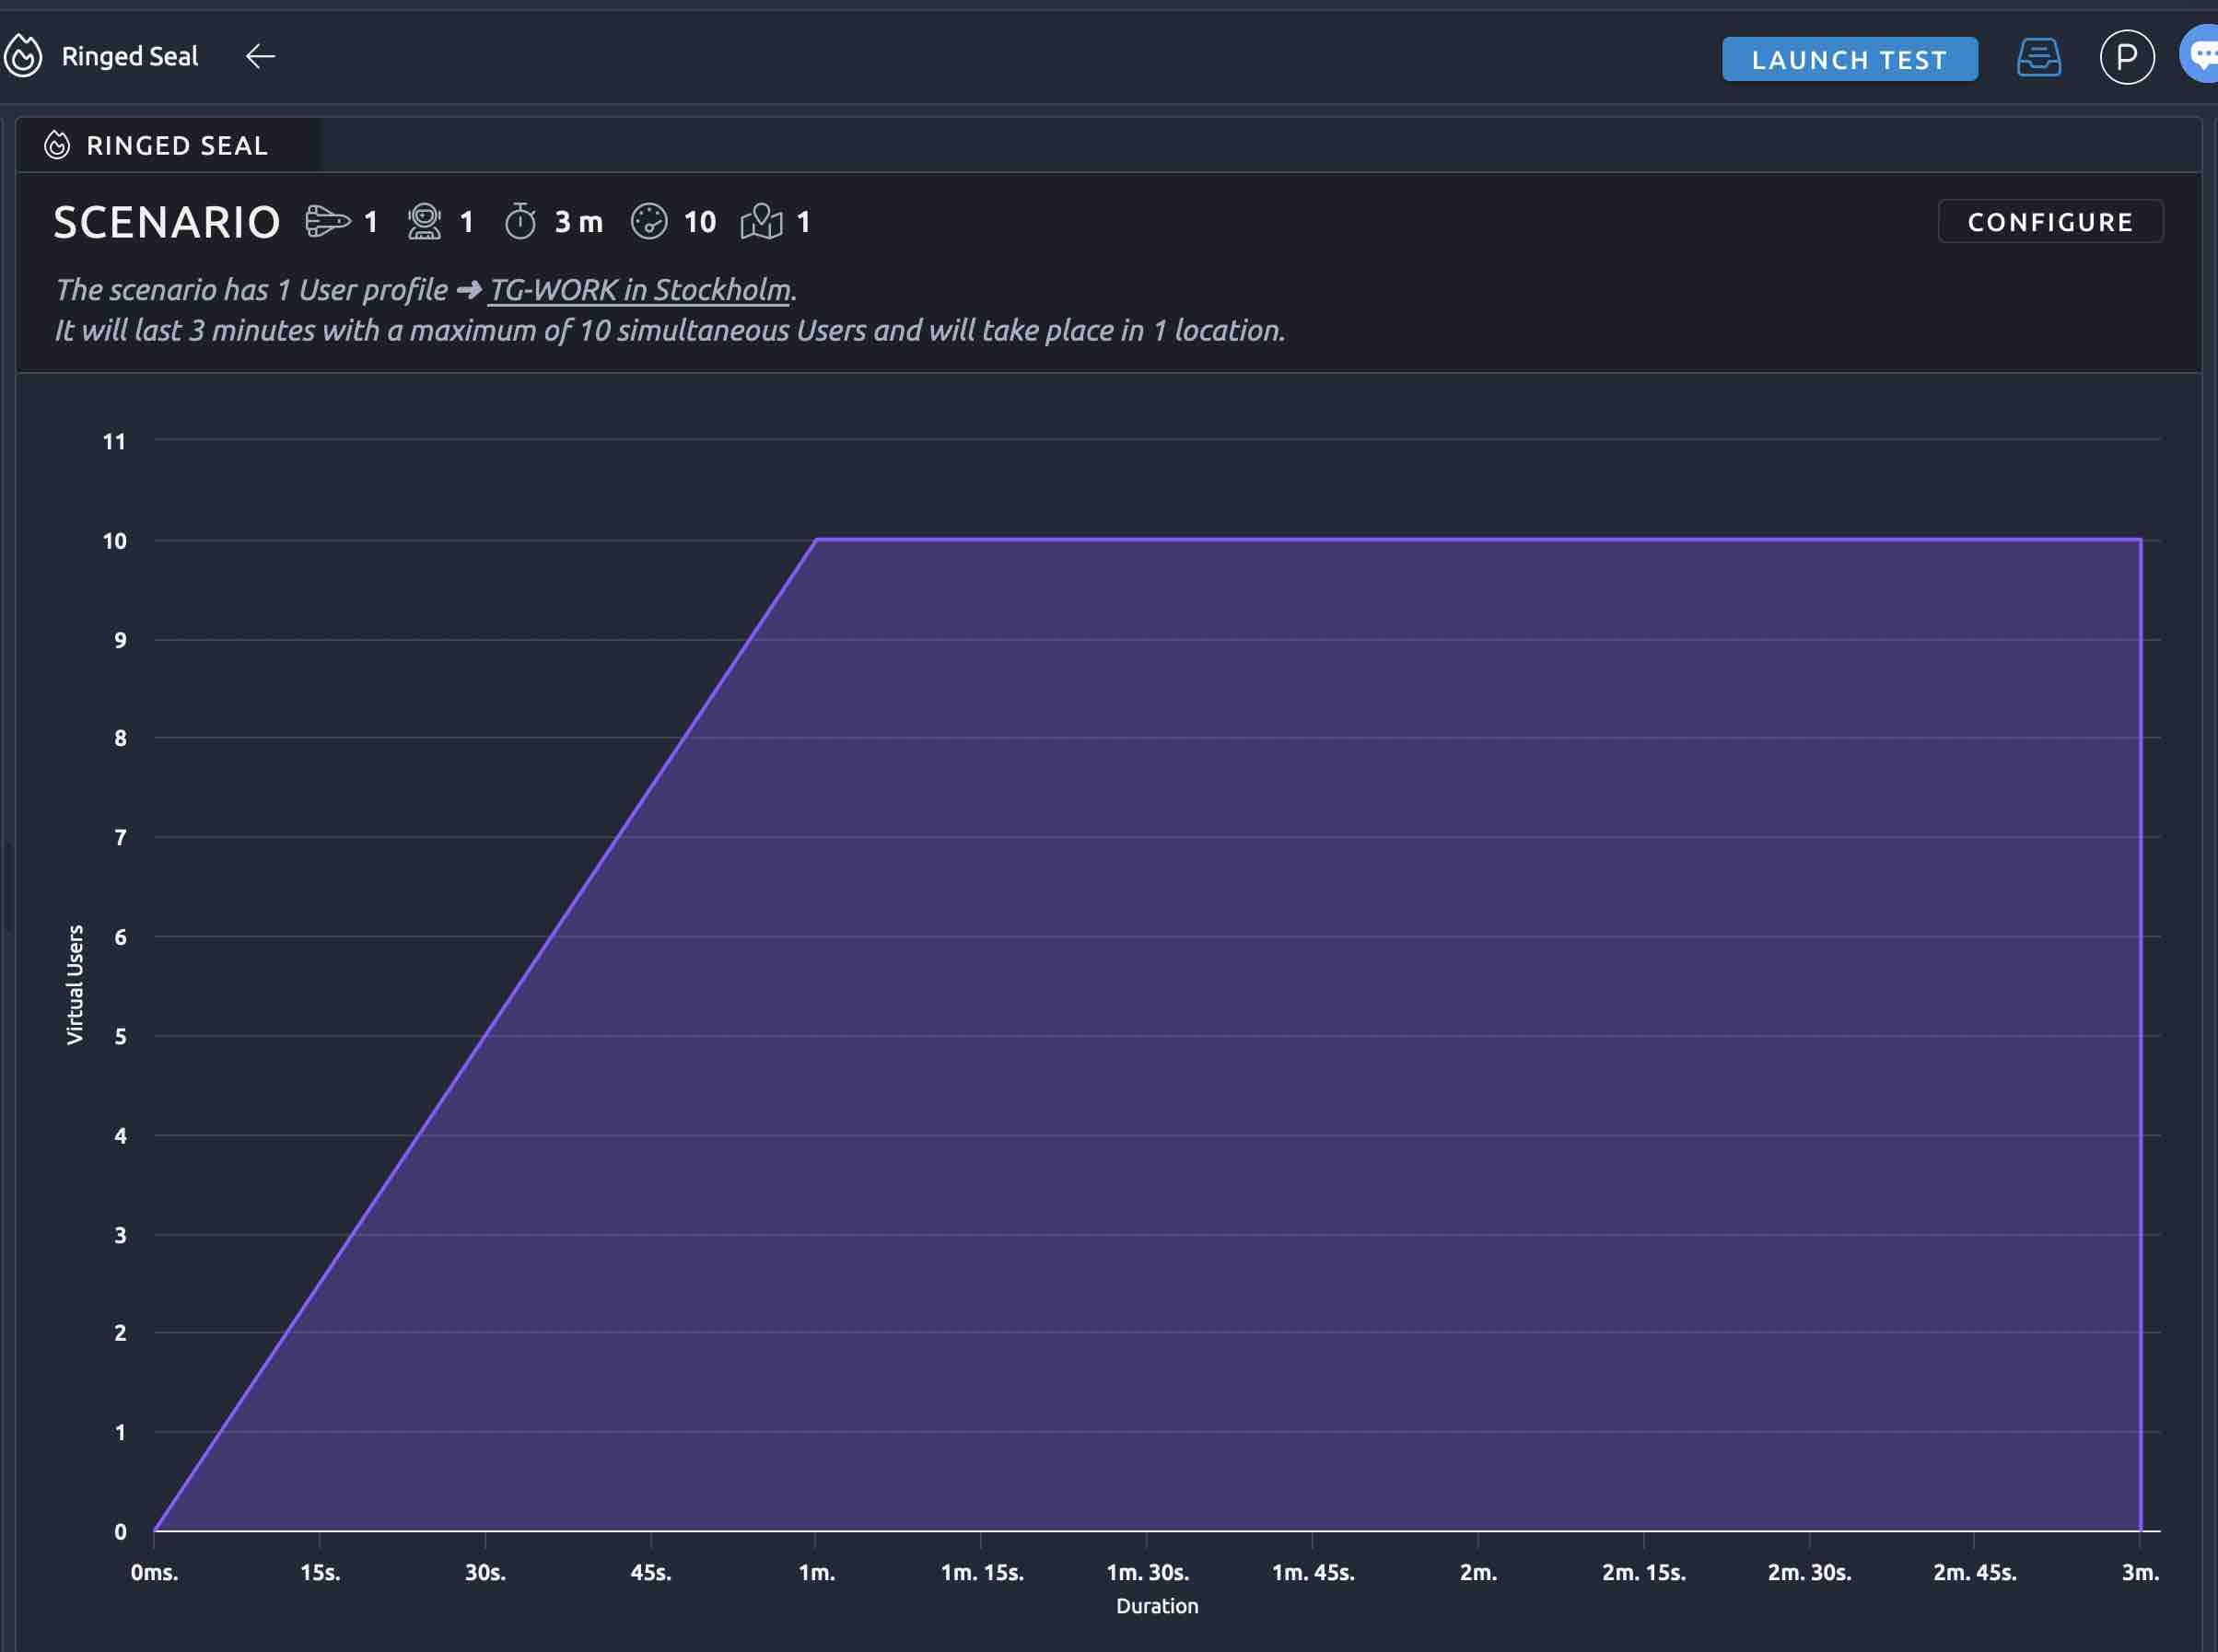
For the demo, we’ll define 10 Virtual Users ramping from 0 to 10 in 1 minute then holding the load for 2 minutes:
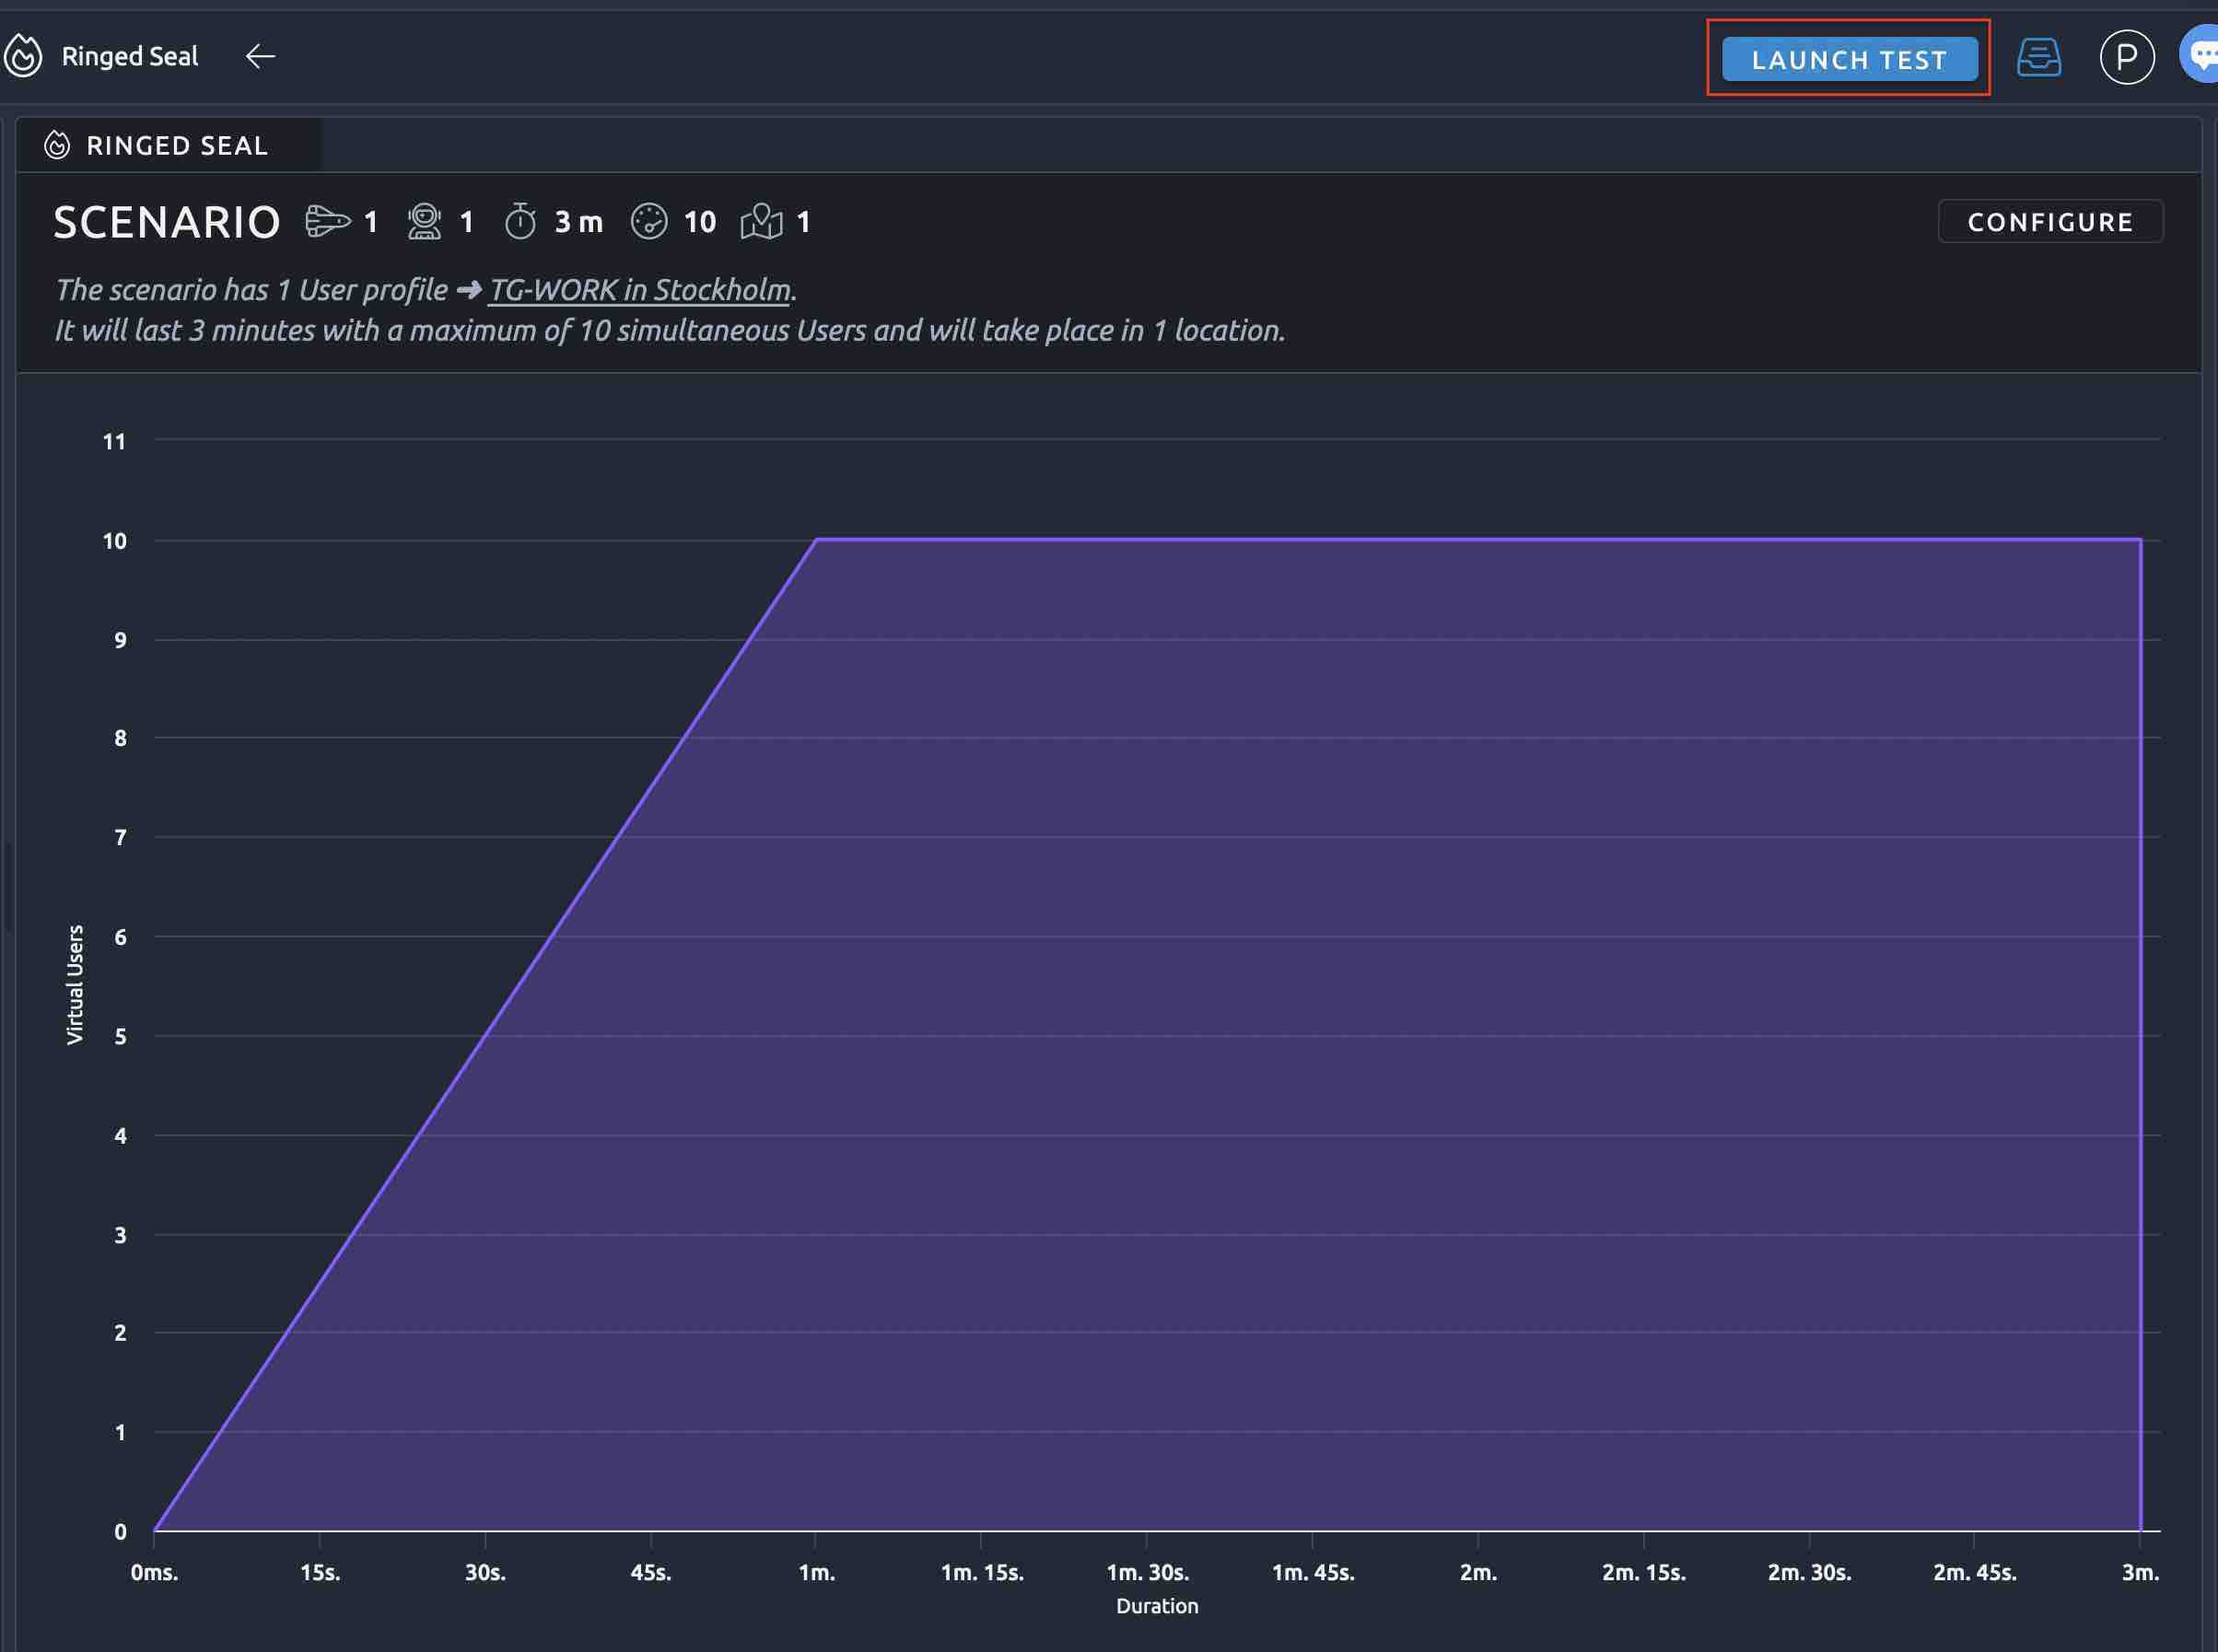
Run Test:

To run the test, we click on Launch Test:
We can see the live results:
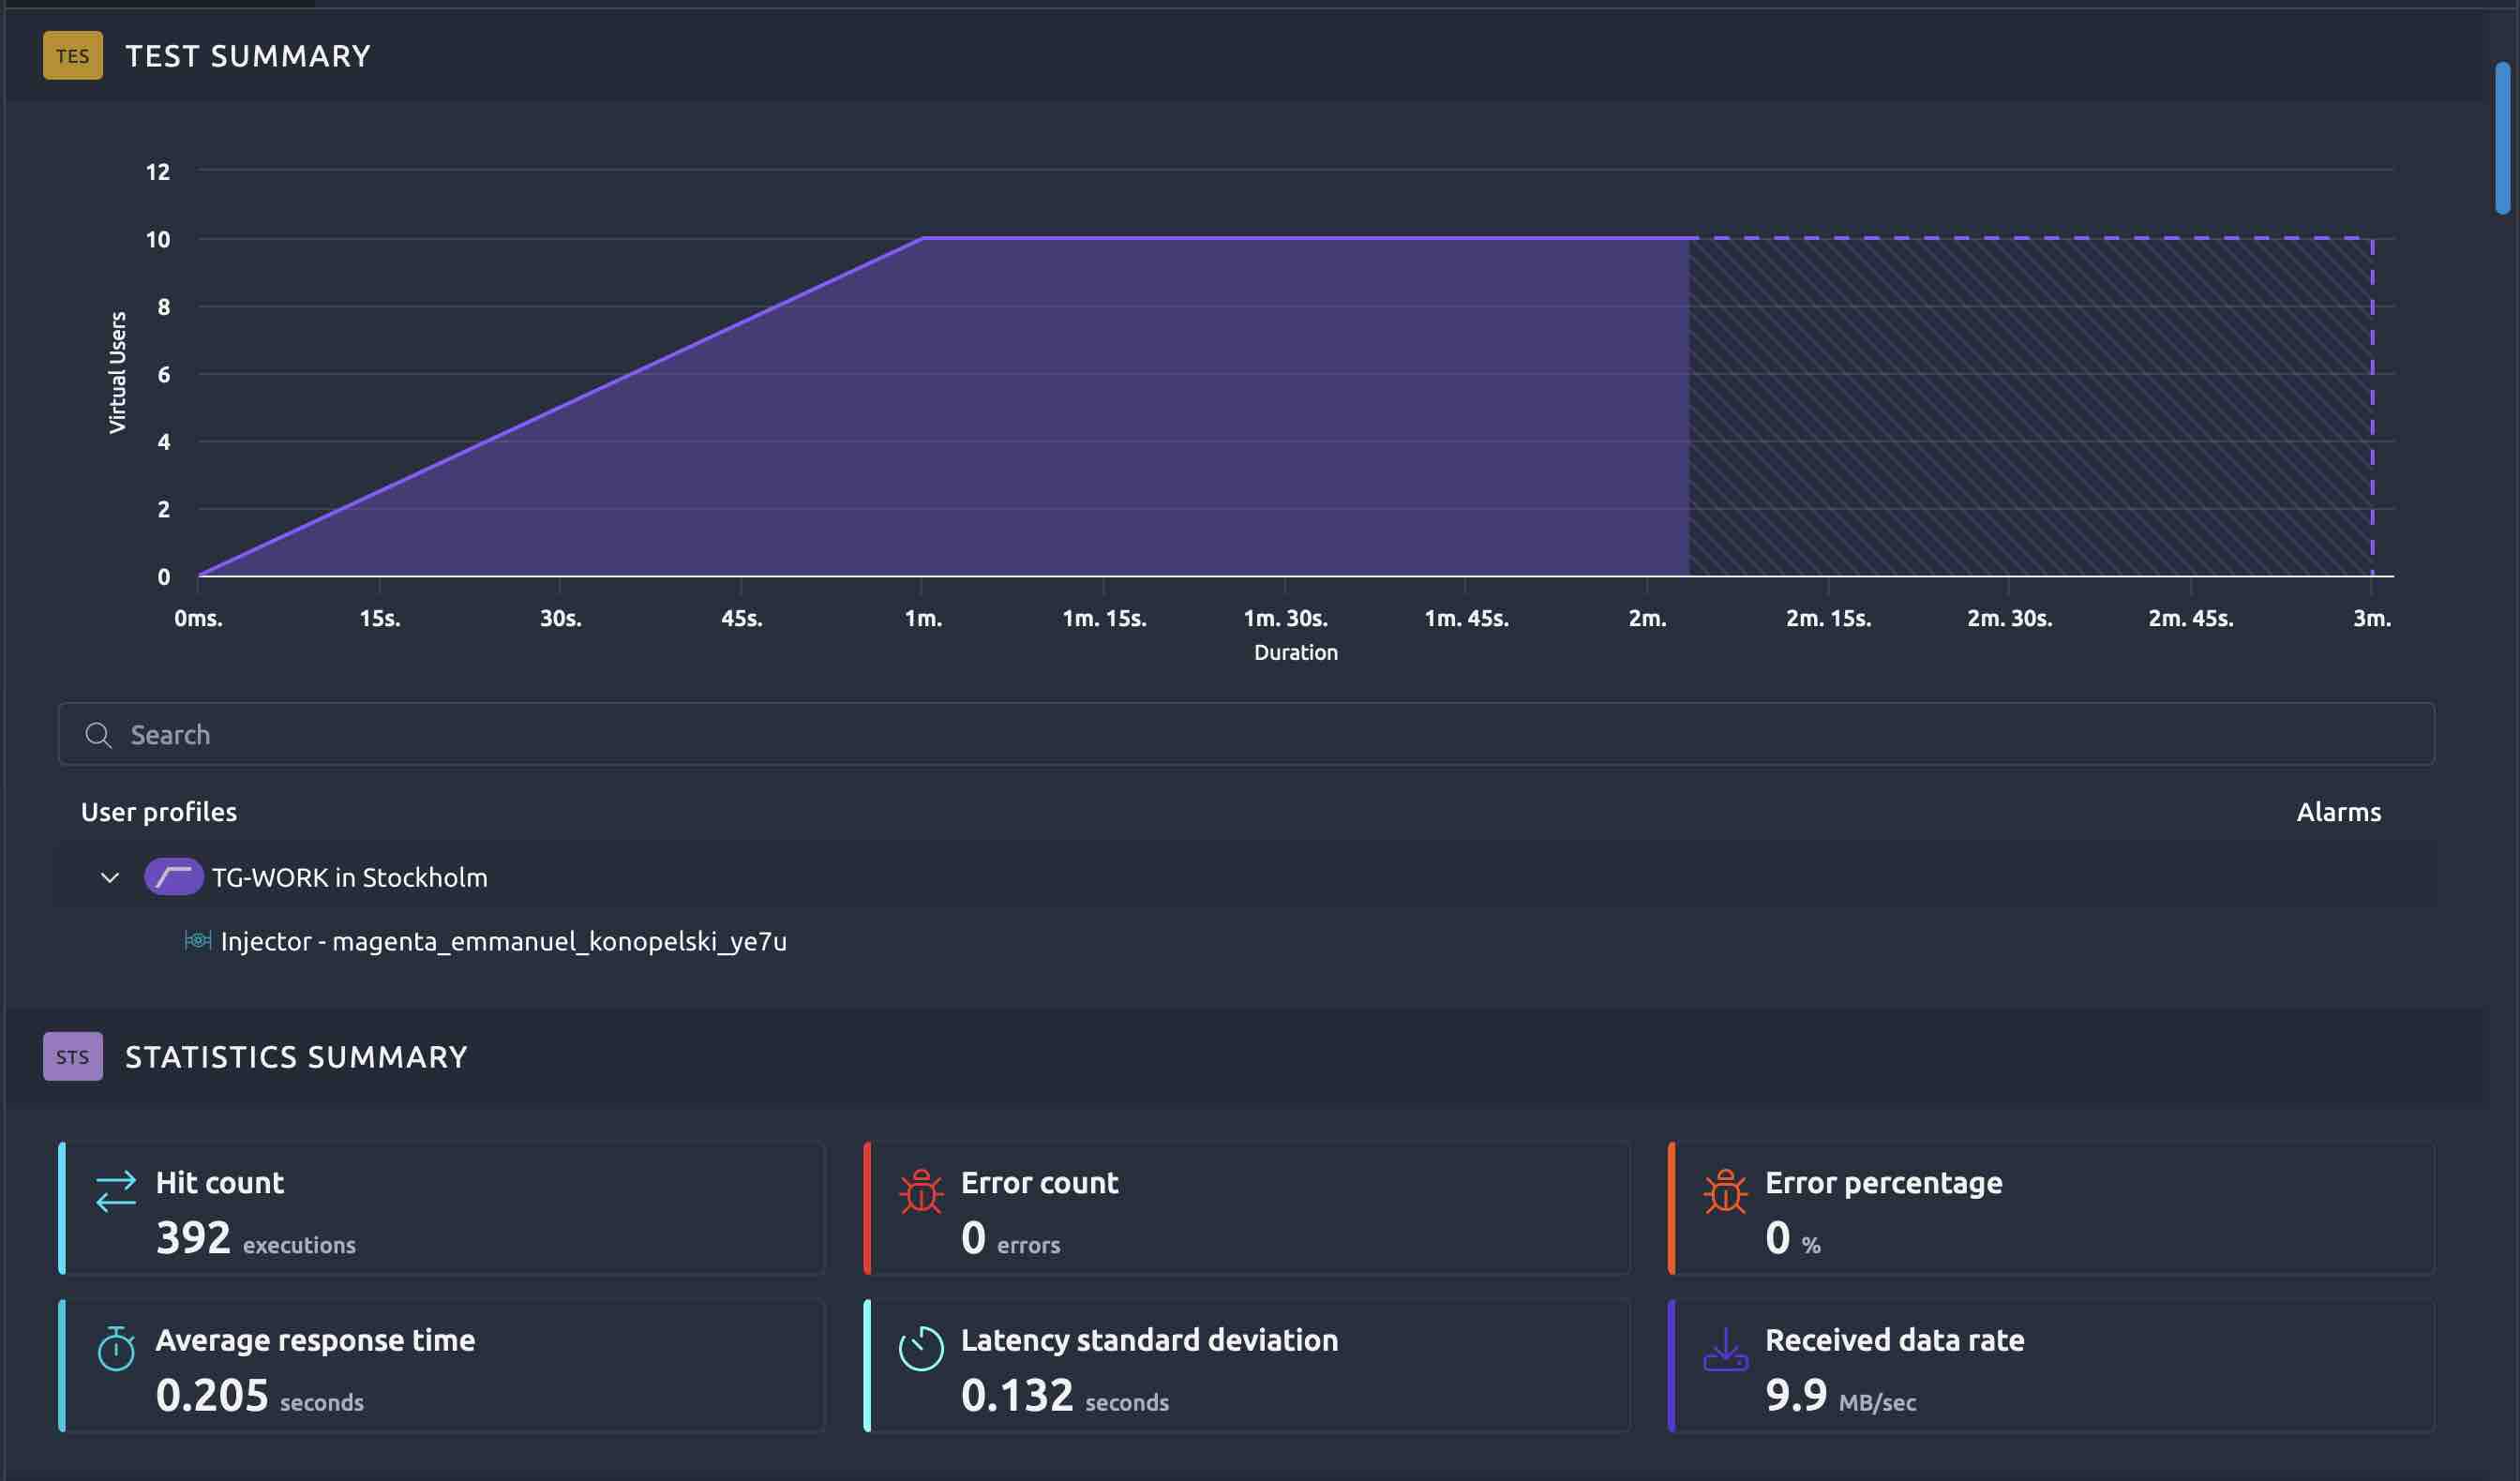
We can also see the response times, error rate per request type, the plugin automatically handle all requests related to your Video Stream (Manifest audio and video, Chunks audio and video …):
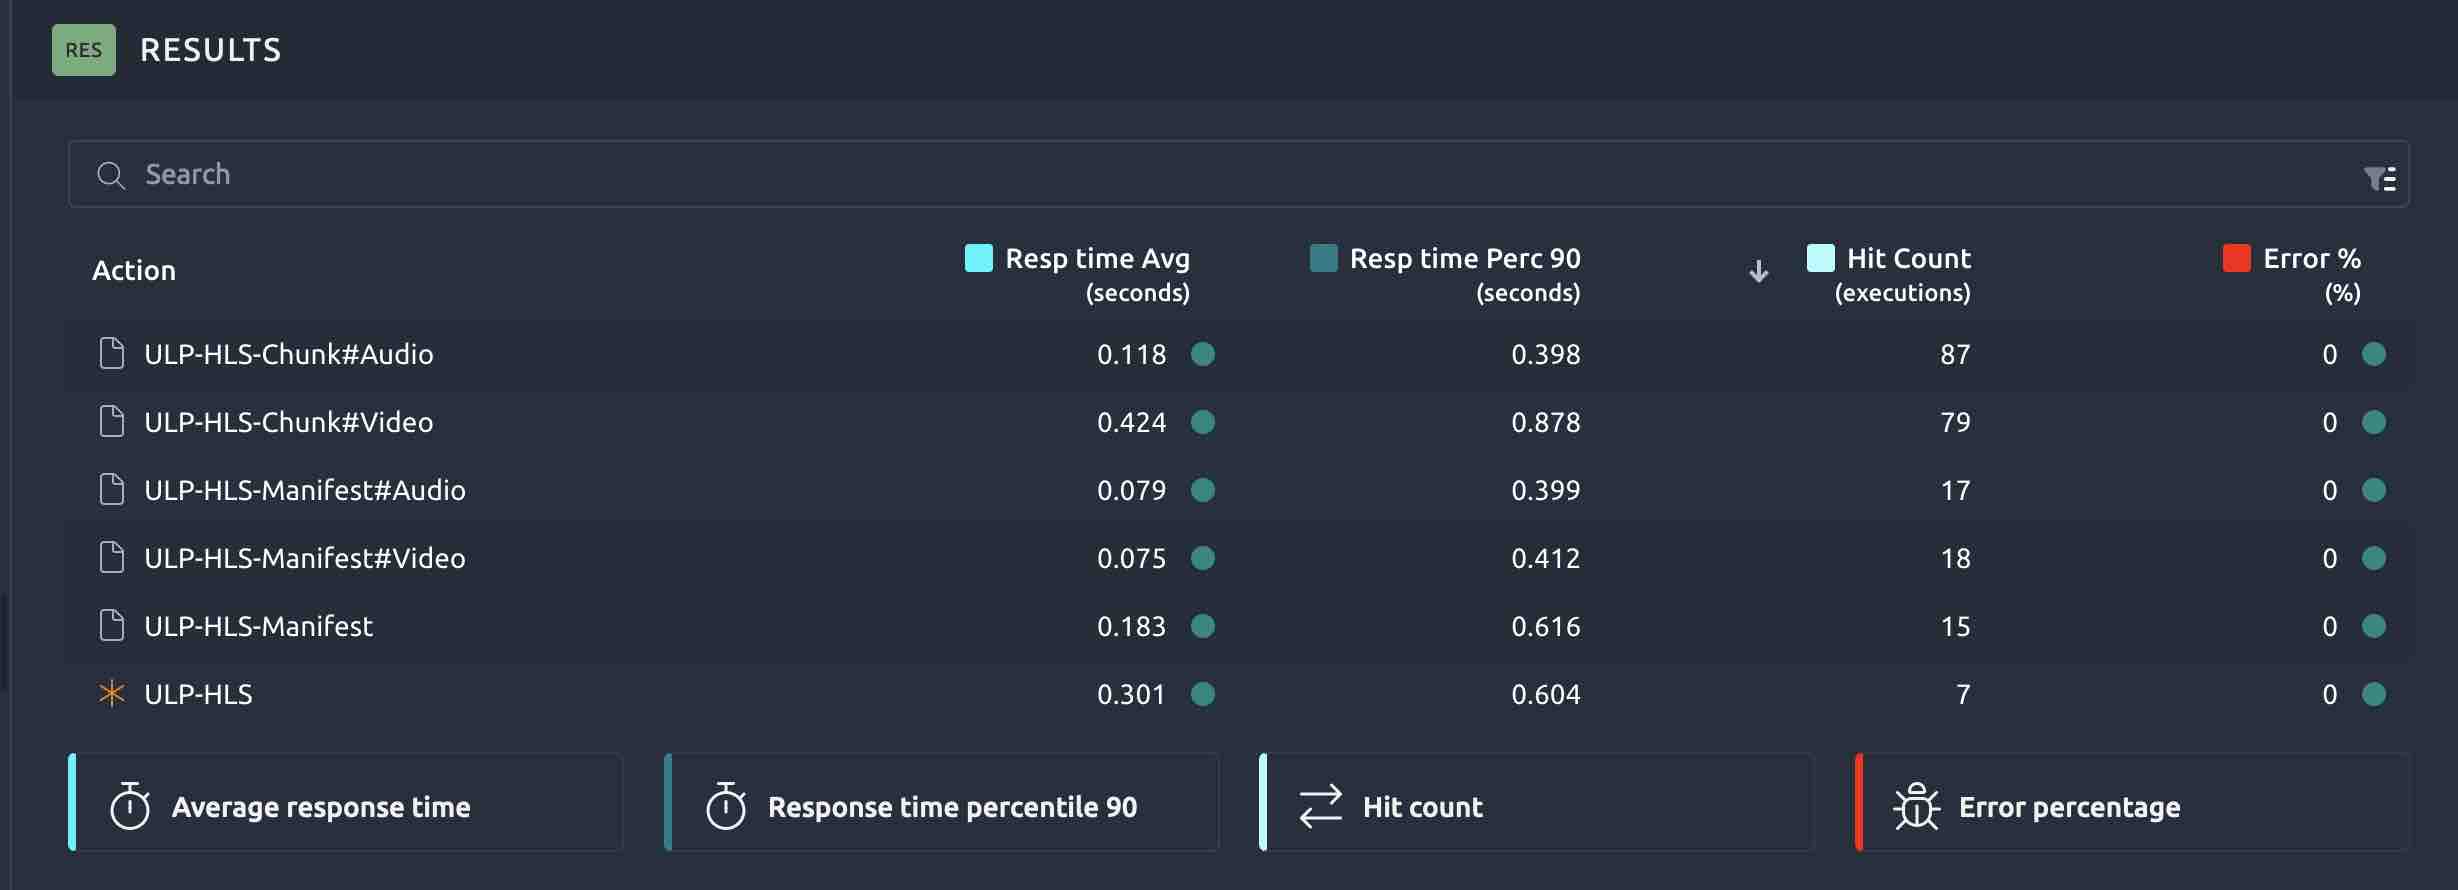
NDLR :

In this blog, we’ve seen how to use a popular SAAS for performance testing called OctoPerf with our UbikLoadPack Video Streaming plugin.
Thanks to this tool, you can scale our solution to hundreds of thousands of Virtual Users in few minutes to performance test your Video Streaming infrastructure.

Try it:

Request a trial version HERE.
Ask for a turnkey or consulting service at ubik-load-pack-sales@ubik-ingenierie.com.

Manage your UBIK Load Pack plugins with JMeter-plugins Manager

About UbikLoadPack :

You’ll probably also like:

L’article Running a Video Streaming Performance Test with OctoPerf and UbikLoadPack est apparu en premier sur Ubik Ingénierie.


UBIK Load Pack AutoCorrelator Plugin

$
0
0

You have a Vaadin based application or you are Oracle ERP Solution users and you want to load test using Apache JMeter.

But, due to the large number of variables, technical parameters and scripts, you have problems for :

  • set up tests of Oracle ERP Solution and Vaadin applications,
  • keep up to date Oracle ERP Solution scripts,
  • implement effective tests of your application avoiding the cache effect.

Hopefully, UBIK Load Pack AutoCorrelator plugin is the solution you’re looking for.

Indeed, our plugin AutoCorrelator allows to record and replay test scenarios by supporting correlation of technology technical Ids.

Moreover, it will extract and inject every variable that need to be correlated on every request.

So, all the hard and boring work is done for you, just record and replay after modifying business variables!

In this blog, we will give you a clear view of the features of UBIK Load Pack AutoCorrelator Solution.

Compatibility

Our plugin supports the technologies :

  • Oracle ERP Solutions
    • SIEBEL 8.X
    • JDEDWARDS 9.X
    • PEOPLESOFT
    • HYPERION 11.X
  • VAADIN based applications
    • VAADIN 7.X, 8.X

It’s compliant with JMeter 3.x up to 5.x.

Highlights of UBIK Load Pack AutoCorrelator Solution

Easy to install

Installation is only a matter of:

  • copying the plugin jar in jmeter/lib/ext,
  • configuring the license key.

Easy to use

Once your script is recorded and your business values are variabilized, you will be able to launch your load test within few minutes !

Indeed, here is how UBIK Load Pack AutoCorrelator Solution works :

First, you need to record your script.

With its seamless integration with JMeter, you can record your application scenario as you would do for a regular HTTP website.

Just select File > Templates… > Recording, select “HTTP(S) Test Script Recorder” and click Start button. After recording your script, you can press the Stop button, and close your browser.

Then, you can variabilize the business values.

Indeed, when doing tests or performance tests, it is critical to have a wide range of data to avoid cache effect and too optimistic results.

To make tests portable across environments, it is also important to be able to variabilize.

So, to variabilize the business values of your script, you can use Jmeter element CSV Data Set Config.

Next, the only thing left to do is to use the AutoCorrelator plugin.

You just need to add 2 children to your test plan:

1. ULP Autocorrelator PreProcessor to inject the variables (set up for the technology you are testing)

2. ULP Autocorrelator PostProcessor to extract variables (set up for the technology you are testing)

The last step, only for Vaadin , is to add a response assertion.

Indeed, when an error occurs with Vaadin, the response code is still an HTTP/1.1 200 OK. To be aware if something went wrong, you can add a Response Assertion. To do this, right click on the Transaction Controller : Add -> Assertions -> Response Assertion.

Then, add a pattern that does NOT contains the pattern “appError” and “Out of sync” :

Response Assertion for VAADIN application

Now, you can start your load test, correlation is automatically done by our plugin.

Functions

__ulp_AC_V(variableName, defaultValue)

This function is used to get the value of an automatically correlated variable.

__ulp_AC_setVar (variableName, variablValue)

It allows you to override/set the value of an automatically correlated variable, for example, to override it with your own manually correlated value.

__ulpSplitStarArray (stringToSplit, storageVariablesPrefix)

This function is specific to Siebel protocol. It provides parsing of Siebel Star Array strings.

About Ubik Load Pack:

L’article UBIK Load Pack AutoCorrelator Plugin est apparu en premier sur Ubik Ingénierie.

UbikLoadPack Java Serialization Plugin

$
0
0

You want to load test Java Serialization performance but, due to binary requests and responses, it is not easy to variabilize the requests and extract data from responses.

Hopefully, UbikLoadPack Java Serialization plugin is the solution you’re looking for. This plugin combined with Apache Jmeter will allow you make your load test realistic and useful.

Indeed, our plugin transforms Java Object into a readable XML format and facilitates the variabilization of scripts, assertion and correlation.

In this blog, we will give you a clear view of what are the features of UbikLoadPack Java Serialization plugin.

Highlights of UbikLoadPack Java Serialization Solution

Easy to install

Installation is only a matter of:

  • copying the plugin jar in jmeter/lib/ext
  • configuring the license key

Easy to record

To record the scenario, we will use the Standard JMeter HTTP(S) Test Script Recorder.

Just select File > Templates… > Recording, select “HTTP(S) Test Script Recorder” and click Start button. After recording your script, you can press the Stop button, and close your browser.

UBIK Java Serialization Plugin seamlessly integrates with Standard JMeter and works behind the scene to transform the binary protocol to readable XML format.

Easy to correlate and variabilize a test plan

Thanks to your knowledge of Standard JMeter and elements provided by our plugin, you can variabilize a test plan very quickly and very simply.

UbikLoadPack Java Serialization Solution features

Manipulate meaningful XML instead of JAVA encoded request

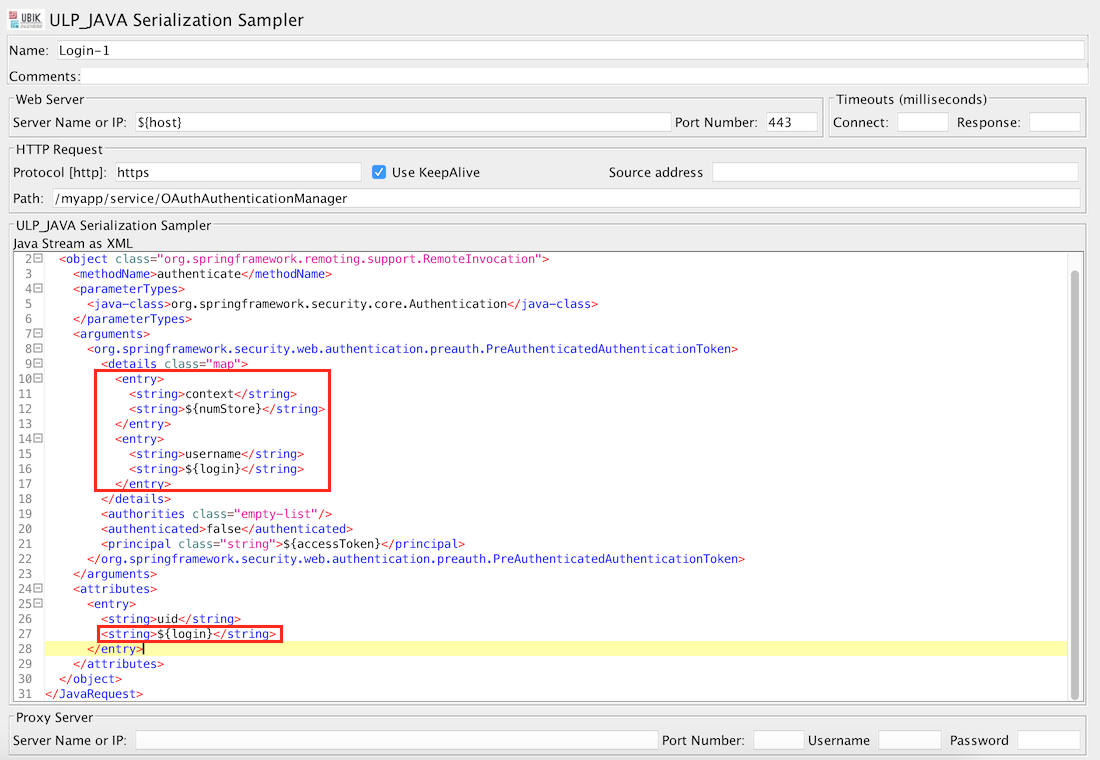
During recording, under Thread Group > Recording Controller, ULP_JAVA Serialization Sampler  was created automatically and immediately by our plugin.

Now, you can variabilize your script.

In our example : we have made 3 variables : numStore, login and accessToken.

ULP_JAVA Serialization Sampler

Extract Object for manipulation by Jmeter Xpath Extraction

You can extract data by adding element ULP RESPONSE AS XML PostProcessor.

This will extract the Java Serialized Response and transform it to XML and store and expose it as a variable (in our example : RESPONSE). Once done, you can use JMeter XPath Assertion and select “JMeter variable” to extract data.

ULP JAVA to XML

Manipulate the responses as Objects in Java user JSR223 and Groovy

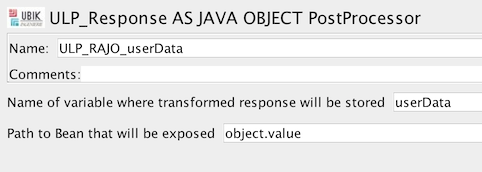
You can extract data by adding element ULP_Response AS JAVA OBJECT PostProcessor.

This will convert response to Java and store and expose it as a JMeter variable (in our example : userData).

ULP Java as Object

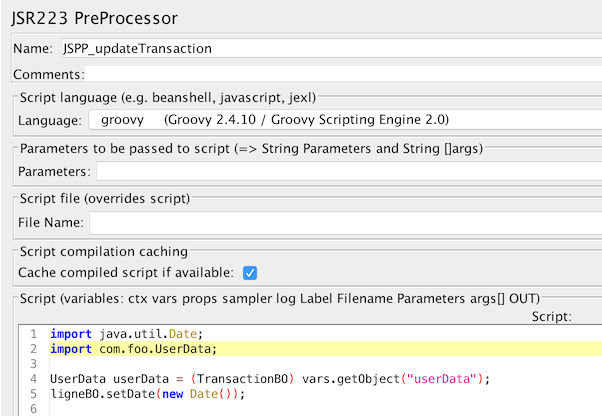
Once done, you can use JSR223 Test elements and Groovy to extract data.

JSR223 updateObject with Groovy

You are then able to serialize it again to XML using the next function that will translate it to binary format.

Serialize the Java Object again to XML

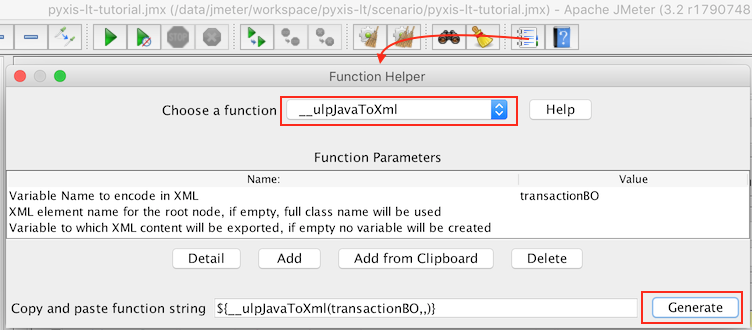
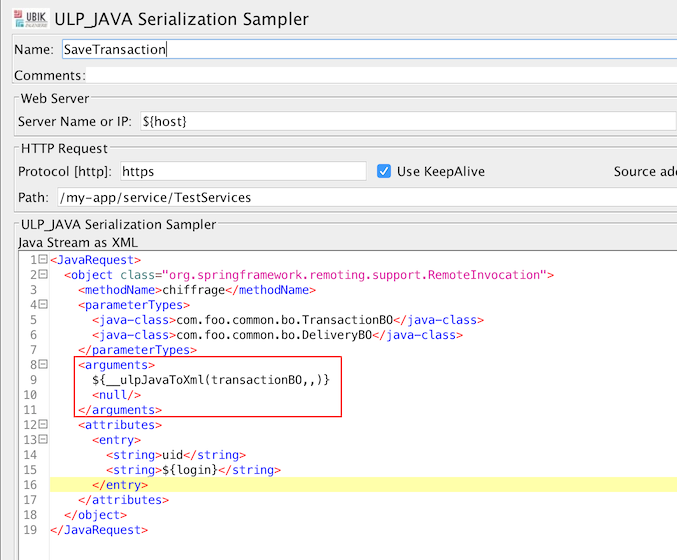
This plugin offers a function __ulpJavaToXml that allows you to serialize the Java Object again to XML.

This function transforms any java object to a format that plugin understands so that object can
be sent to server

Here, you can see thanks to Function Helper Dialog, its parameters:

Function Helper for __ulpJavaToXml

You can use it in a Java Serialization Sampler to serialize back to XML the Java Object stored under variable “transactionBO“:

ULP_JAVA Serialization Sampler

Java Assertion to check your responses are OK

Add an ULP_JAVA Assertion to easily check that your response does not return an exception or non response.

ULP Java ASSERTION

About us:

L’article UbikLoadPack Java Serialization Plugin est apparu en premier sur Ubik Ingénierie.

What is DASH multi period and when to use it ?

$
0
0

MPEG-DASH (Dynamic Adaptive Streaming over HTTP, ISO/IEC 23009-1:2012) is a vendor free format that is used to stream content through HTTP requests.

MPEG-DASH uses playlists called Media Presentation Description that end with .mpd extension.

When to use it ?

Multi-period is usually used to add content to a video, such as advertising or to split your video into different content.

Ads content

Adding an ad to a dash video is implemented using multi-period, if you want to monetize your video you can use the notion of ad insertion, for example you can add a 20-second ad every 30 minutes on a live stream.

Below is a diagram showing a multi-period video containing ads

Video containing ads

Split your video into different content

You can use multi-period to divide your video into several parts.

For example:

  • Period 1 : introductory technology presentation video,
  • Period 2 : introductory speech,
  • Period 2 : in-depth presentation of the technology
  • Period 4 : an example of how the technology is used

What is Dash multi period ?

Multi-period can be used with VOD or Live video.

A dash media presentation description is split into parts called periods.

If the manifest contains a single period then it is considered to be the whole video, but if a manifest contains several periods then each period represents a piece of the video.

The player must parse the manifest and determine the correct period to use and then change period during playback according to the start dates of the periods.

For example with the following manifest (source :

https://reference.dashif.org/dash.js/nightly/samples/dash-if-reference-player/index.html)

<MPD xmlns="urn:mpeg:dash:schema:mpd:2011" xmlns:xsi="http://www.w3.org/2001/XMLSchema-instance" xsi:schemaLocation="urn:mpeg:dash:schema:mpd:2011 DASH-MPD.xsd" profiles="urn:mpeg:dash:profile:isoff-live:2011,http://dashif.org/guidelines/dash-if-simple" type="dynamic" availabilityStartTime="1970-01-01T00:00:00Z" publishTime="1970-01-01T00:00:00Z" minimumUpdatePeriod="PT2S" minBufferTime="PT2S" timeShiftBufferDepth="PT1M" maxSegmentDuration="PT2S">
  <ProgramInformation>
    <Title>Basic MPD with 640x480@30 video at 300kbp and 48kbps audio using SegmentTemplate with `$Number$`</Title>
  </ProgramInformation>
  <Period id="P28325691" start="PT472094H51M">
    ......
  </Period>
  <Period id="P28325692" start="PT472094H52M">
    .......
  </Period>
  <Period id="P28325693" start="PT472094H54M">
    .......
  </Period>
  <UTCTiming schemeIdUri="urn:mpeg:dash:utc:http-iso:2014" value="https://time.akamai.com/?isoms"></UTCTiming>
</MPD>

In the previous example, the player must change the period after one minute between P28325691 and P28325692 (because PT472094H52MPT472094H51M = 1 min) and 2 minutes between P28325692 and P28325693 (because PT472094H54MPT472094H52M = 2 min), the period change may be higher or lower depending on the different periods .

If the date when parsing manifest for the first time is Thu Nov 09 2023 15:51:15 GMT+0000 the player must choose the period which id is P28325691 because:

  • PT472094H51M = 472094 * 3600000 + 51 * 60000 = 1699541460000 ms since epoch
  • PT472094H52M = 472094 * 3600000 + 52 * 60000 = 1699541520000 ms since epoch
  • Thu Nov 09 2023 15:51:15 GMT+0000 = 1699541475000 ms since epoch So Thu Nov 09 2023 15:51:15 GMT+0000 is between PT472094H51M and PT472094H52M

What’s next

This feature will be available in a future release, stay tuned !

About UbikLoadPack :

Ubik Load Pack Streaming Solution features

You’ll probably also like:

L’article What is DASH multi period and when to use it ? est apparu en premier sur Ubik Ingénierie.
UbikLoadPack Video Streaming Plugin 9.1.5

$
0
0

We are proud to announce the release of the version 9.1.5 of our performance testing tool for Video Streaming servers (HLS, MPEG-DASH, HSS, HDS).

We will see in this blog the release notes of this version

Update License tracking

UbikLoadPack license format has changed, if you have an old license format (before April 1st, 2024), it is important to upgrade to this version and request a new license file from our support.

Actual live offset is now in Milliseconds

This metric which was previously a number of chunks, has been changed to be a number of milliseconds.

If you manually configure properties, you’ll need to update the following ones :

jmeter.reportgenerator.graph.custom_ulp_actual_live_offset.classname=com.ubikingenierie.jmeter.plugin.videostreaming.graphing.ULPCustomGraphConsumer
jmeter.reportgenerator.graph.custom_ulp_actual_live_offset.title=Actual Live Offset (Distance from Live)
jmeter.reportgenerator.graph.custom_ulp_actual_live_offset.property.set_Y_Axis=Duration in ms
jmeter.reportgenerator.graph.custom_ulp_actual_live_offset.property.set_X_Axis=Elapsed Time (granularity\: ${ULP.overall_granularity_sec}s)
jmeter.reportgenerator.graph.custom_ulp_actual_live_offset.property.set_granularity=${jmeter.reportgenerator.overall_granularity}
jmeter.reportgenerator.graph.custom_ulp_actual_live_offset.property.setSampleVariableName=ulp_actual_live_offset

Bug fixes

  • Dash : URI formation for time sync using the UTCTimingElement is incorrect if no BaseURL is present

  • VOD : Keep Init segment if offset is used

Java version

Note that this version now requires Java >=11 and supports LTS versions :

  • Java 11
  • Java 17
  • Java 21

About UbikLoadPack :

Ubik Load Pack Streaming Solution features

You’ll probably also like:

L’article UbikLoadPack Video Streaming Plugin 9.1.5 est apparu en premier sur Ubik Ingénierie.